What Equipment Do You Need to Grow Autoflowers Indoors?
Growing autoflowers indoors is one of the easiest ways to produce consistent cannabis harvests while maintaining control over the growing environment. Unlike photoperiod plants, autoflowers flower automatically, making them a popular choice for beginners and growers with limited space.
A common question among new growers is: what equipment do you need to grow autoflowers indoors? While some setups can be highly advanced, most successful grows rely on a few essentials, including a quality grow light, basic ventilation, suitable containers, and a reliable growing medium.
The good news is that you do not need an expensive grow room to get started. Many growers achieve excellent results with simple setups and upgrade their equipment as they gain experience.
In this guide, you’ll learn which equipment is essential for growing autoflowers indoors, which items are optional, and how to choose the right setup for your space and budget.
What Supplies Do You Need to Grow Autoflowers Indoors?
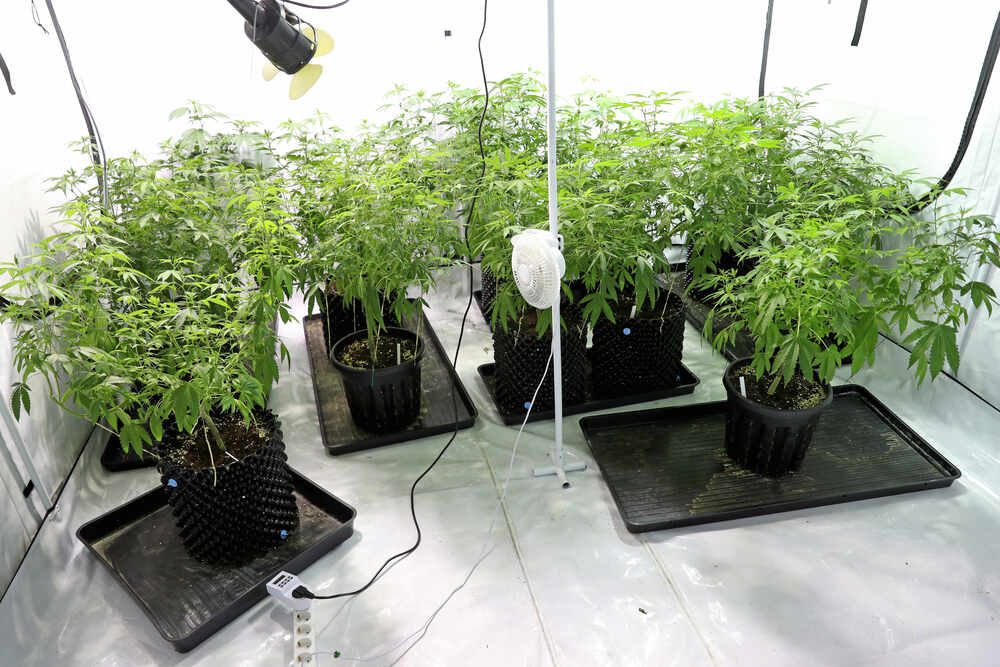
Growing autoflower cannabis indoors requires a combination of essential equipment and environmental control tools. While advanced systems can improve efficiency, most successful autoflower grows rely on a simple setup that provides stable lighting, airflow, and root-zone conditions.
At minimum, indoor autoflower growers need:
- Autoflower seeds
- Full-spectrum LED grow light
- Fabric pots or containers
- Soil or growing medium
- Cannabis nutrients
- Airflow and ventilation
- Water
- Environmental monitoring tools
Autoflowers have a shorter lifecycle than many cannabis varieties, making consistency especially important. Healthy root development, proper lighting, and stable environmental conditions typically have a greater impact on plant performance than expensive equipment.
Essential vs Optional Autoflower Growing Equipment
Many new growers invest in advanced equipment before mastering the fundamentals. While environmental controllers, CO₂ supplementation, and automated systems can improve efficiency, they are rarely necessary for growing healthy autoflowers indoors.
I generally recommend building confidence with a simple setup before upgrading to more complex systems.
| Essential Equipment | Why It Matters |
| Full-spectrum LED grow light | Provides the light energy required for growth and flowering |
| Ventilation system | Maintains airflow, temperature, and humidity levels |
| Growing medium | Supports root development and nutrient uptake |
| Cannabis nutrients | Supplies essential macro and micronutrients |
| Fabric pots | Promote drainage, root oxygenation, and healthy growth |
| Environmental monitoring tools | Help maintain stable growing conditions |
| Optional Equipment | Why It Can Be Useful |
| Automated irrigation | Reduces watering workload |
| Environmental controllers | Automate temperature and humidity management |
| Reverse osmosis system | Improves water quality and nutrient control |
| UV supplemental lighting | May enhance resin production during late flowering |
| CO₂ supplementation | Can improve growth in highly controlled environments |
Recommended Beginner Autoflower Grow Setup
For most growers, a simple indoor setup is more than capable of producing healthy autoflower harvests.
| Equipment | Why It Works for Autoflowers |
| Full-spectrum LED grow light | Energy efficient, low heat output, and suitable for the entire grow cycle |
| Small grow tent | Makes environmental control easier in compact spaces |
| 3–5 gallon fabric pots | Allow strong root development while avoiding transplant stress |
| Organic soil | Forgiving and beginner-friendly |
| Oscillating fan | Improves airflow and strengthens stems |
| Basic nutrient line | Covers essential feeding requirements |
| Thermometer and hygrometer | Monitor temperature and humidity levels |
| pH meter | Helps prevent nutrient uptake issues |
| Autoflower seeds | Fast-growing, compact, and ideal for indoor cultivation |
| Timer plugs | Automate lighting schedules for consistency |
Choosing the Right Autoflower Seeds
Genetics play a major role in plant health, growth rate, yield potential, and overall growing experience. Choosing high-quality autoflower seeds from reputable breeders gives growers the best chance of achieving consistent results indoors.
For beginners, some of the easiest autoflower strains are often the simplest to manage because they fit comfortably within smaller grow spaces and typically require less maintenance.. Many indoor growers prefer indica-dominant autoflowers due to their shorter stature and manageable growth patterns, while larger sativa-dominant autoflowers may require additional vertical space and canopy management.
When selecting autoflower seeds, consider:
- Plant size at maturity
- Flowering time
- Indoor suitability
- Breeder reputation
- Yield potential
- Environmental resilience
Reliable genetics often make indoor cultivation simpler by producing more consistent growth patterns and reducing the likelihood of unexpected issues during the grow cycle.
Complete Indoor Autoflower Growing Equipment Checklist
Use the following checklist when setting up an indoor autoflower grow space:
| Equipment | Purpose |
| LED grow light | Provides the light required for healthy growth and flower development |
| Grow tent or dedicated grow space | Helps regulate temperature, humidity, airflow, and light exposure |
| Oscillating fan | Improves airflow and reduces the risk of stagnant air and mould |
| Inline extraction fan | Removes warm air and maintains fresh air exchange |
| Carbon filter | Controls odours during flowering |
| Fabric pots | Improve drainage and root oxygenation |
| Organic soil | Supports healthy root growth and nutrient buffering |
| Cannabis nutrients | Supply essential nutrients throughout the grow cycle |
| pH meter | Helps maintain optimal nutrient availability |
| Thermometer and hygrometer | Monitor environmental conditions |
| Timer plugs | Automate lighting schedules |
| Pruning scissors | Useful for plant maintenance and harvesting |
This equipment provides everything most growers need to take autoflower cannabis plants from seed to harvest indoors while maintaining a stable and productive growing environment.
Choosing the Right Indoor Space for Autoflowers
The location you choose for your indoor grow can have a major impact on how easy it is to manage your autoflowers throughout their lifecycle. A suitable grow space should provide enough room for your plants and equipment while remaining easy to access and maintain.
Common indoor growing locations include:
- Grow tents
- Closets
- Spare bedrooms
- Basements
The best growing spaces are typically:
- Private and discreet
- Easy to access
- Clean and organised
- Close to electrical outlets
- Suitable for installing ventilation equipment
Avoid areas that experience significant temperature fluctuations, such as garages, sheds, or attics, as unstable conditions can make indoor growing more difficult.
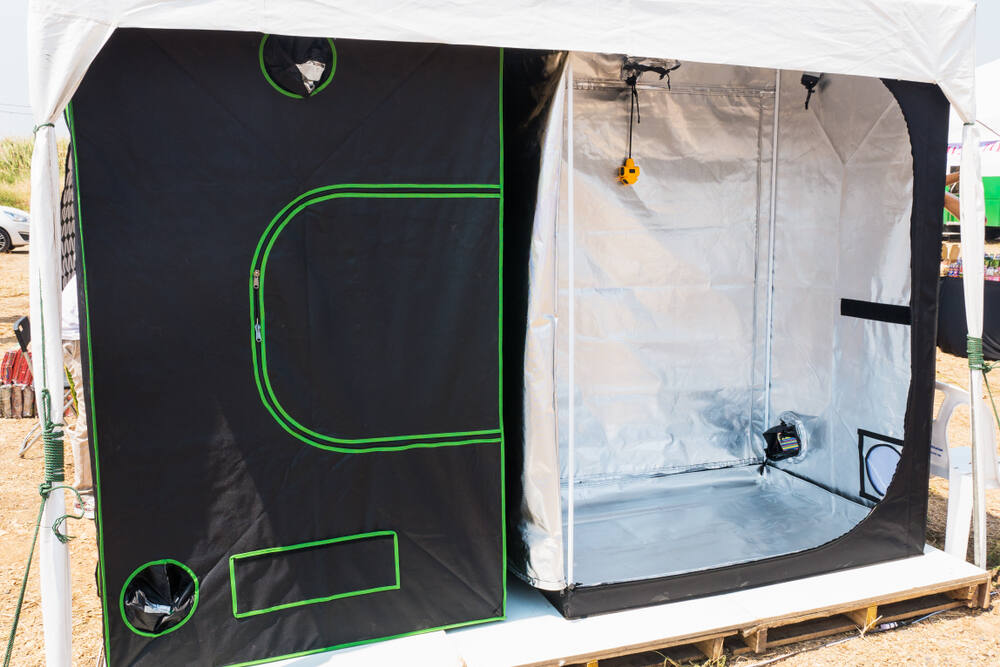
Grow Tents vs Closets vs Open Rooms
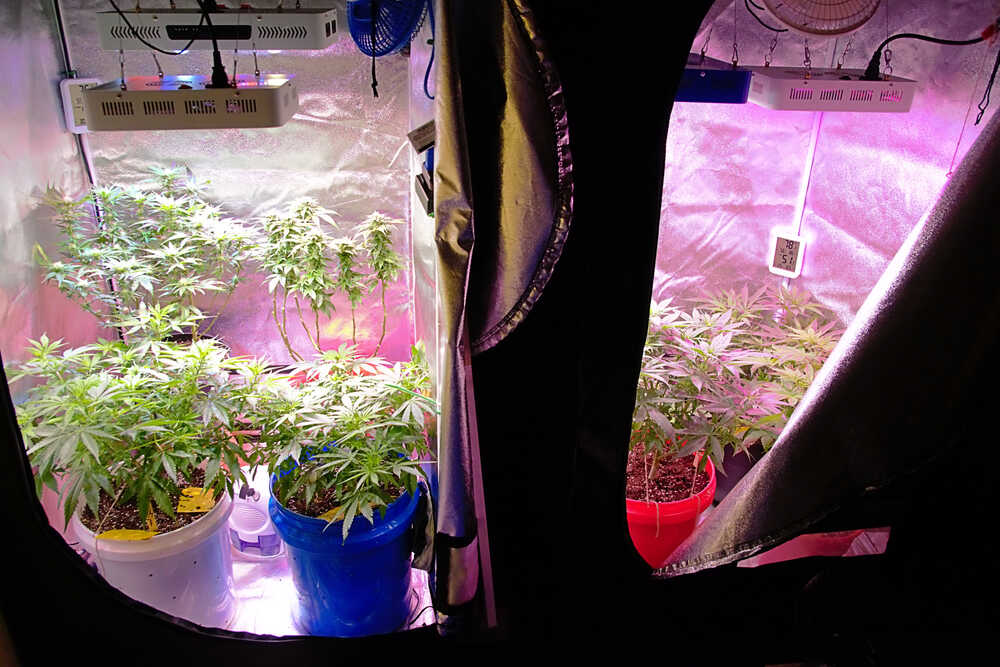
For most indoor autoflower growers, a grow tent offers the simplest and most practical solution. Grow tents create a dedicated growing space while helping keep equipment organised and plants protected from outside disturbances.
For growers interested in growing autoflowers in a grow tent, tents provide the simplest way to create a controlled indoor environment while keeping equipment organised.
Most grow tents feature reflective interiors that improve light distribution and maximise the efficiency of your grow lights.
Grow tents also help:
- Reduce light leaks
- Contain odours more effectively
- Keep growing equipment organised
- Separate plants from the surrounding environment
Common beginner tent sizes include:
| Tent Size | Recommended Autoflower Capacity |
| 2×2 ft | 1–2 autoflowers |
| 3×3 ft | 2–4 autoflowers |
| 4×4 ft | 4–6 autoflowers |
Closets can also be used successfully if there is enough room for lighting and ventilation equipment. Open-room growing is generally more suitable for growers with dedicated spaces and larger setups.
What Size Grow Tent Do Autoflowers Need?
One of the advantages of autoflower genetics is their compact size, making them ideal for smaller indoor grow spaces.
The tent size you choose should be based on:
- The number of plants you intend to grow
- The size of the autoflower strain
- Container size
- Available floor space
As a general guide:
| Grow Tent Size | Suitable For |
| 2×2 ft | 1–2 small to medium autoflowers |
| 3×3 ft | 2–4 medium autoflowers |
| 4×4 ft | 4–6 autoflowers or larger varieties |
When selecting a grow tent, it is usually better to allow slightly more space than you think you need. Additional room makes plant maintenance easier and provides greater flexibility when arranging equipment and containers.
What Equipment Do You Need to Grow Autoflowers Indoors Successfully?
While every piece of grow equipment plays a role in plant health and development, lighting is arguably the most important investment for indoor autoflower cultivation. Because autoflowers rely entirely on artificial light when grown indoors, choosing the right grow light can have a significant impact on growth, yields, and overall plant performance.
Best Grow Lights for Indoor Autoflowers
Modern full-spectrum LED grow lights are considered the best grow lights for autoflowers because they provide efficient light coverage while producing less heat than older technologies. They provide the light intensity needed for healthy growth while producing less heat and consuming less electricity than older lighting technologies.
Benefits of LED grow lights include:
- Lower heat output
- Improved energy efficiency
- Full-spectrum light coverage
- Reduced cooling requirements
- Longer lifespan than traditional grow bulbs
While some growers still use HPS lighting, LEDs have become the standard for indoor autoflower cultivation due to their efficiency and ease of use in smaller grow spaces.
When choosing a grow light, look for:
- Full-spectrum output
- Suitable coverage for your grow area
- Adjustable hanging height
- Reliable PPFD performance
- Quality components from reputable manufacturers
Cheap low-intensity LED fixtures often struggle to provide sufficient canopy penetration during flowering, which can limit growth and reduce final yields.
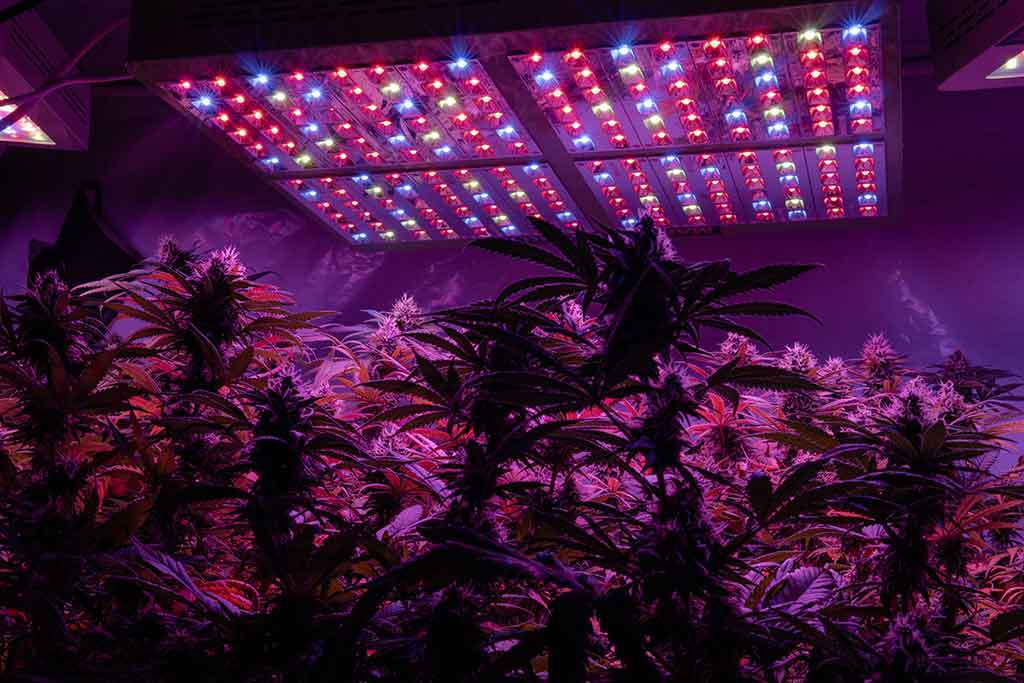
Understanding Light Spectrum and PPFD
Autoflowers benefit from full-spectrum lighting throughout their entire lifecycle. Modern LED fixtures combine a range of wavelengths that support healthy growth from seedling through to harvest, eliminating the need to switch lighting systems as plants mature.
Light intensity is commonly measured using PPFD (Photosynthetic Photon Flux Density), which indicates how much usable light reaches the plant canopy.
As a general guide:
| Growth Stage | Recommended PPFD |
| Seedling | 100–300 µmol/m²/s |
| Early Growth | 400–600 µmol/m²/s |
| Flowering | 600–900 µmol/m²/s |
Providing the correct light intensity at each stage helps support healthy development while reducing the risk of light stress.
What Is the Best Light Schedule for Autoflowers?
Unlike photoperiod cannabis plants, autoflowers do not require changes to the light cycle in order to begin flowering. Most indoor growers keep the same lighting schedule throughout the entire grow.
The most commonly used autoflower light schedules are:
| Light Schedule | Common Use |
| 18/6 | Most popular balance of growth and efficiency |
| 20/4 | Maximises daily light exposure while allowing a rest period |
| 24/0 | Continuous light used by some growers throughout the grow cycle |
For beginners, an 18/6 schedule is often the simplest and most reliable option because it provides plenty of light while helping to manage electricity costs and heat output.
How Far Should LED Grow Lights Be From Autoflowers?
The ideal distance between your grow light and canopy depends on the fixture’s power output and the growth stage of your plants.
As a general guideline, many LED grow lights are positioned approximately 18–24 inches above the canopy. However, growers should always follow the manufacturer’s recommendations, as hanging heights can vary significantly between fixtures.
Monitoring plant response is often the best way to identify whether adjustments are needed. Signs of excessive light intensity may include leaf bleaching, upward leaf curling, or slowed growth, while insufficient light can result in stretching and weaker plant structure.
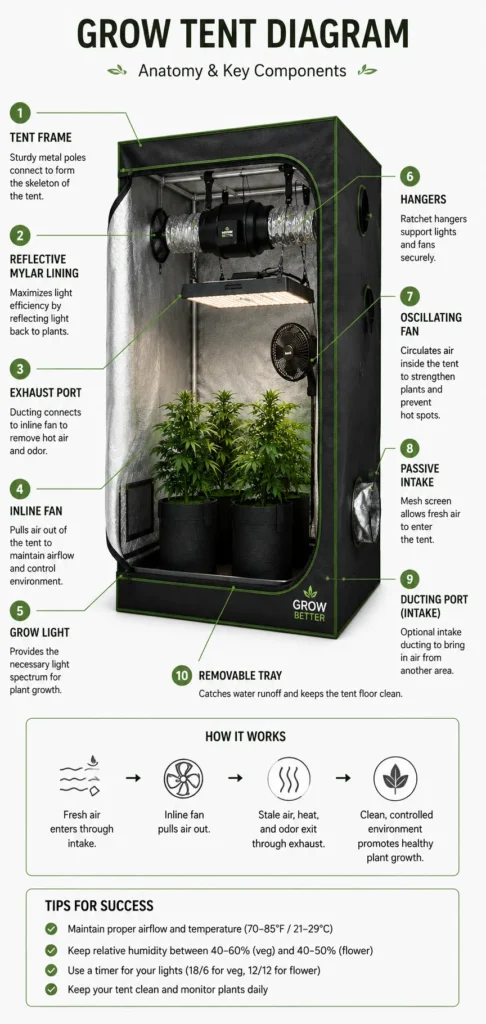
Ventilation Systems, Fans, and Carbon Filters for Autoflowers
Good ventilation helps keep an indoor autoflower grow space fresh, stable, and easier to manage. While lighting drives growth, airflow helps prevent stale air, excess moisture, and odour build-up inside the tent or grow room.
A typical indoor autoflower ventilation setup includes:
- Inline extraction fan
- Carbon filter
- Ducting
- Oscillating fan
- Passive or active air intake
The inline extraction fan removes warm, stale air from the grow space, while fresh air enters through an intake vent or intake fan. This steady air exchange helps maintain a healthier growing environment and supports consistent plant development.
Carbon filters are especially useful during flowering, when autoflowers can produce strong odours. The filter connects to the extraction system and helps clean outgoing air before it leaves the grow space.
For most indoor grow tents:
| Grow Space | Typical Fan Size |
| Small tents, such as 2×2 ft | 4-inch inline fan |
| Medium tents, such as 3×3 or 4×4 ft | 6-inch inline fan |
| Larger rooms | Higher-capacity extraction system |
Oscillating fans are used inside the grow space to move air gently around the canopy. The goal is light leaf movement rather than strong direct wind, which can stress young autoflowers.
Because autoflowers move quickly from seedling to flowering, poor airflow can cause problems before plants have much time to recover. A simple ventilation setup with steady extraction, clean air intake, and gentle circulation is usually enough for most beginner indoor autoflower grows.
Best Growing Mediums, Containers, and Nutrients for Autoflowers

Choosing the right growing medium, container, and nutrient strategy can have a significant impact on the health and performance of indoor autoflowers. While there is no single “best” option for every grower, some setups are more forgiving and beginner-friendly than others.
Because autoflowers have a relatively short lifecycle, many growers prioritise simplicity and consistency over highly technical growing methods. Selecting the right foundation from the start can make the entire grow easier to manage.
Choosing a Growing Medium for Autoflowers
Most indoor autoflower growers choose between:
- Soil
- Coco coir
- Hydroponics
Each option offers different advantages depending on your experience level and growing goals.
| Growing Medium | Pros | Cons |
| Soil | Beginner-friendly, buffers nutrients, improves terpene development | Slower growth and lower yields |
| Coco Coir | Faster growth and excellent root oxygenation | Requires more precise feeding and watering |
| Hydroponics | Rapid growth and high yield potential | More expensive and less forgiving |
For most beginners, organic soil is usually the easiest option. It naturally buffers nutrients, retains moisture well, and allows more room for error than coco or hydroponic systems.
Because autoflowers have limited time to recover from stress, many growers prefer soil during their first few grows before experimenting with more demanding cultivation methods.
Fabric Pots vs Plastic Pots
The type of container you choose affects drainage, root development, and watering frequency.
| Pot Type | Best For | Advantages | Disadvantages |
| Plastic Pots | Soil and coco grows | Affordable and widely available | Reduced airflow around roots |
| Fabric Pots | Soil and coco grows | Improved drainage and root oxygenation | Dry out more quickly |
| Net Pots | Hydroponic systems | Excellent root oxygenation | Require hydroponic equipment |
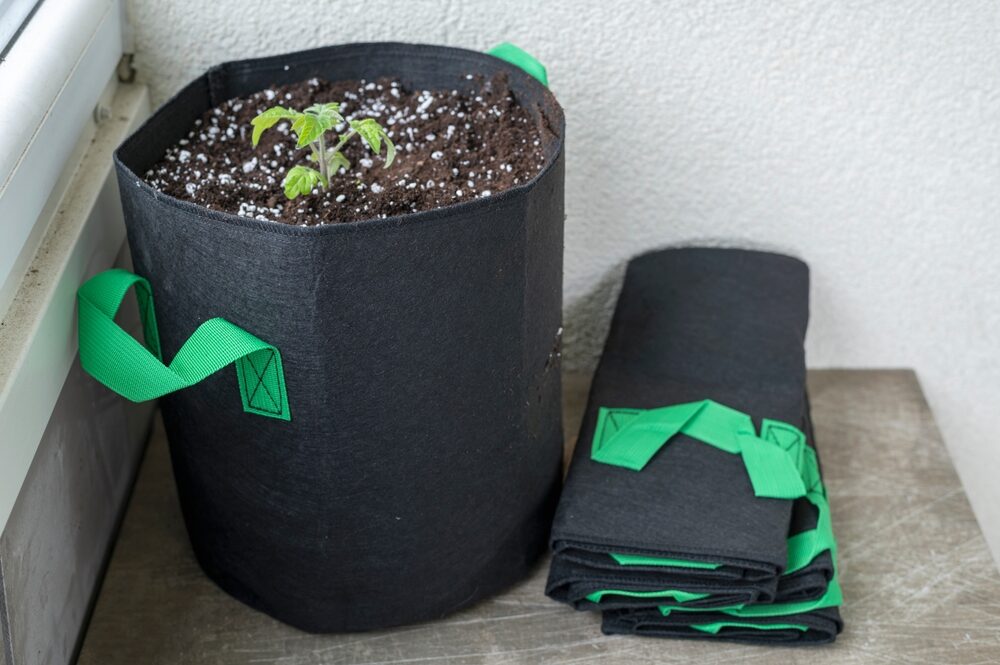
Fabric pots are particularly popular among indoor autoflower growers because they encourage healthy root development while reducing the risk of overwatering.
Many growers also start autoflowers directly in their final container rather than transplanting multiple times throughout the grow. This helps minimise transplant stress and allows roots to develop uninterrupted from seed to harvest.
What Pot Size Is Best for Autoflowers?
Choosing the correct pot sizes for autoflowers can influence root development, plant size, and overall yield potential.
| Pot Size | Best For |
| 3 Gallon | Most indoor autoflower grows |
| 5 Gallon | Larger autoflower varieties and extended growth |
| 7 Gallon | Large grow spaces and high-yield setups |
For most indoor growers, 3–5 gallon fabric pots provide an excellent balance between root space, plant size, and ease of management.
Nutrients, pH, and EC Monitoring Equipment
Indoor autoflower growers need a few basic tools to manage feeding and maintain healthy plant growth. For most beginners, a quality nutrient line and a pH meter are the most important investments.
Essential Nutrient Supplies
Autoflowers require essential nutrients such as nitrogen, phosphorus, potassium, calcium, magnesium, and trace minerals.
Common nutrient supplies include:
| Equipment | Purpose |
| Base nutrient line | Provides essential nutrients |
| Measuring syringe or pipette | Allows accurate dosing |
| Mixing container | Prepares nutrient solutions |
| Watering can or pump sprayer | Applies water and nutrients |
For beginners, a simple nutrient range is usually easier to manage than complex multi-bottle systems.
pH Monitoring Equipment
Maintaining the correct pH helps plants absorb nutrients efficiently.
| Equipment | Purpose |
| Digital pH meter | Measures water and nutrient solution pH |
| pH Up | Raises pH |
| pH Down | Lowers pH |
| Calibration solution | Maintains meter accuracy |
Recommended pH ranges:
| Growing Medium | pH Range |
| Soil | 6.0–7.0 |
| Coco Coir | 5.5–6.5 |
| Hydroponics | 5.5–6.5 |
A digital pH meter is one of the most useful tools for preventing nutrient-related problems.
EC Monitoring Equipment
EC meters measure nutrient strength and are particularly useful for coco coir and hydroponic grows.
| Equipment | Purpose |
| Digital EC meter | Measures nutrient concentration |
| Calibration solution | Maintains meter accuracy |
While many soil growers do not need an EC meter, it can help prevent overfeeding, which is a common issue when growing autoflowers.
How to Grow Autoflowers at Home Without Expensive Equipment
One of the biggest misconceptions about indoor autoflower growing is that you need a costly professional setup to produce healthy plants.
You do not.
Many growers start with a simple low-budget setup and upgrade their equipment over time. Autoflowers are especially well suited to smaller home grows because they are compact, fast-finishing, and do not require a separate flowering light schedule.
Can You Grow Autoflowers Without a Grow Tent?
Yes. Autoflowers can be grown indoors without a dedicated grow tent.
Common alternatives include:
- Closets
- Spare rooms
- Converted cupboards
- DIY grow boxes
- Bright indoor spaces with suitable privacy
Grow tents make it easier to control light, airflow, and odour, but they are not strictly required. If growing without a tent, focus on keeping the space clean, discreet, and easy to access.
Growing Autoflowers Indoors Using Sunlight
Some growers use natural sunlight to grow autoflowers indoors near south-facing windows, conservatories, balconies, or patio doors.
This can reduce equipment costs because it limits or removes the need for a dedicated grow light. However, indoor sunlight is usually less intense and less consistent than artificial grow lighting, especially during winter or in shaded rooms.
Sunlight-based indoor grows can work best when:
- Plants receive several hours of strong direct light each day
- The growing area stays warm and stable
- The space has enough privacy
- Plants can be moved or rotated for better light exposure
For stronger results, some growers combine natural sunlight with a small LED grow light to improve consistency without building a full grow room.
Cheap DIY Autoflower Grow Equipment
Budget growers often use simple household or DIY alternatives instead of buying every piece of specialist equipment immediately.
Common lower-cost options include:
| Equipment | Budget Alternative |
| Grow tent | Closet, cupboard, or DIY grow box |
| Oscillating fan | Small household fan |
| Reflective grow walls | White walls or reflective sheeting |
| Carbon filter | Basic odour control until flowering demands increase |
| Seedling tray | Repurposed containers |
| Drying rack | Clothes airer or mesh drying rack |
The main item I would avoid cutting corners on is the grow light. If natural sunlight is limited, a reliable LED grow light will usually make a bigger difference than most other upgrades.
What Equipment Should Budget Growers Prioritise?
If you are growing autoflowers indoors on a limited budget, prioritise the items that most directly affect plant health.
Start with:
- Quality autoflower seeds
- A reliable light source
- Suitable containers
- A forgiving growing medium
- Basic airflow
- pH monitoring equipment
Advanced tools can always be added later, but a simple setup with stable conditions is enough for many beginner indoor autoflower grows.
Cost and Grow Time for Indoor Autoflowers
One of the reasons autoflowers are popular among home growers is that they can be grown successfully using relatively simple equipment. Whether you are building a budget-friendly setup or investing in a more advanced grow space, the total cost will largely depend on the quality of equipment you choose and the size of your grow.
How Much Does It Cost to Grow Autoflowers Indoors?
The cost of an indoor autoflower setup can vary significantly depending on your goals and available budget.
| Indoor Grow Setup | Estimated Cost |
| Basic Budget Setup | $200–$500 |
| Mid-Range Setup | $600–$1,200 |
| Advanced Setup | $2,000+ |
Many beginner growers start with a small tent, LED grow light, basic ventilation, and a simple nutrient programme before gradually upgrading their equipment over time.
LED grow lights are often the most cost-effective option because they use less electricity and generate less heat than older lighting systems, helping to reduce both setup and running costs.
How Long Do Autoflowers Take to Grow Indoors?
One of the biggest advantages of autoflower genetics is their fast seed-to-harvest timeline. Unlike photoperiod plants, autoflowers begin flowering automatically and do not require changes to the light cycle.
Most indoor autoflowers complete their entire lifecycle within a few months, making them one of the quickest cannabis options available to home growers.
| Autoflower Type | Typical Seed-to-Harvest Time |
| Fast Autoflowers | 8–10 weeks |
| Standard Autoflowers | 10–12 weeks |
| Larger Autoflower Varieties | 12–14 weeks |
The exact timeline depends on genetics, lighting quality, growing medium, and overall environmental conditions. Stable growing conditions and high-quality genetics typically produce the most consistent results.
For most indoor growers, an autoflower can be harvested in around 10–12 weeks from seed, making it possible to complete multiple harvests throughout the year.
Frequently Asked Questions
What equipment do you need to grow autoflowers indoors?
Most indoor autoflower growers need a grow light, ventilation system, containers, a growing medium, nutrients, and basic monitoring tools such as a pH meter and thermometer.
What is the best grow light for indoor autoflowers?
Full-spectrum LED grow lights are generally the preferred option because they provide efficient light coverage, produce less heat, and use less electricity than older lighting technologies.
Can you grow autoflowers indoors without a grow tent?
Yes. Autoflowers can be grown indoors in closets, spare rooms, cupboards, or DIY grow boxes. A grow tent simply makes it easier to manage lighting, airflow, and odour control.
How much does it cost to grow autoflowers indoors?
A basic indoor autoflower setup typically costs between $200–$500, while larger or more advanced setups can cost significantly more depending on the equipment used.
How long do autoflowers take to grow indoors?
Most autoflower strains complete their lifecycle within 8–12 weeks from seed, although some larger varieties may take up to 14 weeks depending on genetics and growing conditions.