How to germinate autoflowering cannabis seeds for beginners
If you’re new to growing weed, you’ll be pleased to know that germinating autoflowering seeds is done using the same methodology you’d use for regular cannabis seeds. But if you’re looking to get your seeds off to the perfect start, we’ll walk you through setting up the perfect environment and explore the most effective germination techniques you can use to give them the best chance at growing into big beautiful plants.
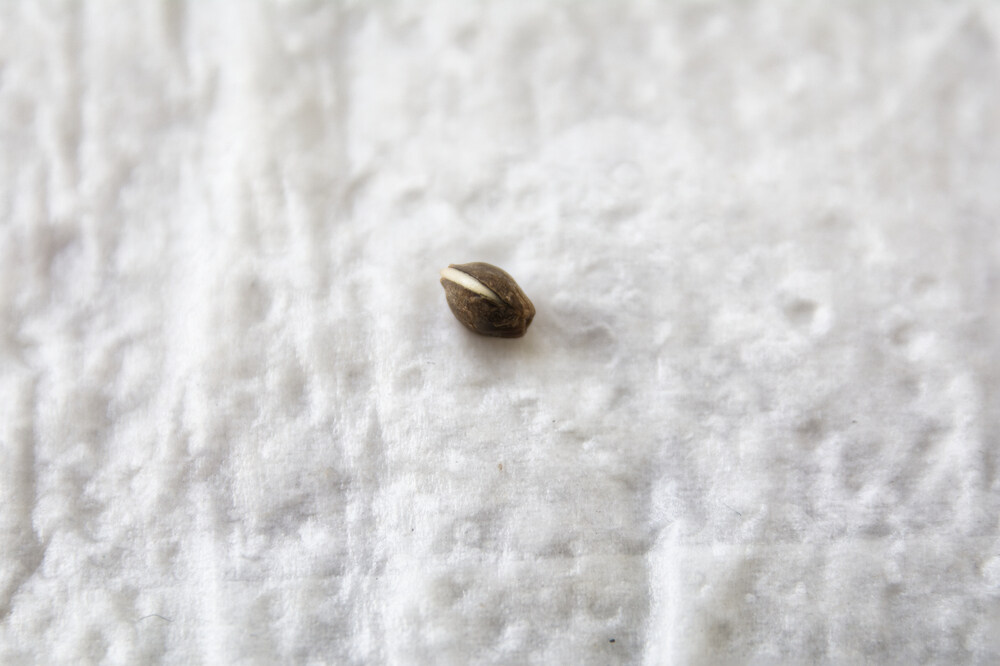
Before you begin, make sure you’re starting with high-quality autoflower seeds from stable genetics to maximise germination success and plant performance.
What is the ideal environment for germinating cannabis seeds?
With cannabis, the environment is everything— even at the very beginning of its lifecycle. Setting up the perfect environment can help your seeds sprout faster and give them a healthy foundation to grow to their fullest potential. Let’s explore the optimal conditions that foster healthy seed germination:
Temperature
Regardless of the type of cannabis seed (feminized, autoflowers, and regular seeds), temperature plays a vital role in getting them to germinate. Cannabis thrives in warm, wet environments, and the perfect temperature range can trick the seed into believing it’s spring, coaxing the seed to sprout. However, if it’s too warm or cold, the seed will remain dormant.
All cannabis seeds thrive at a consistent temperature range between 68-77°F (20-25°C). Usually, this temperature is easy to achieve at home without doing much. However, if the area you’ll be germinating your seeds in runs cooler, you might want to use a heat mat with a temperature sensor to ensure they’re getting the right temperatures. You can also keep them on top of warm appliances, like the dryer or the refrigerator.
Humidity
Cannabis seeds also need humidity, albeit a little higher than you’d want for your plants or cured flowers. For seeds, you should aim to keep your humidity around 70% to convince them to sprout. Humidity helps soften the seed and coax the plant to emerge and begin growing roots. High humidity also helps maintain adequate moisture around the seeds, encouraging those sprouts to search for water and form stronger roots.
Beware of excess humidity, though. If it’s too wet and you’re germinating your seeds in a contaminated medium, mold and fungus can thrive in warm, wet environments. Introducing moldy seedlings to your soil can also be a problem in your garden later. We recommend keeping a hygrometer with your seedlings to monitor them.
Moisture
This one refers more to your growing medium and not necessarily the environment, but it’s essential, nonetheless. You want your growing medium to be moist but not waterlogged, especially if you’re starting your seeds directly in soil or coco. On the other hand, less is more if you are using the paper towel tech. In an enclosed environment like a plastic bag, wet paper towels can suffocate your seeds, but damp ones can coax them out and provide humidity. We’ll touch more on the technique later, but for now, a good rule of thumb is to moisten the medium, allowing the seeds to absorb water without sitting in it, which can impede their oxygen intake.
Airflow
Good airflow in the grow space is crucial for preventing mold and supplying fresh oxygen to the seeds. It’s also useful once they sprout, as a breeze can cause your plants to release a chemical that strengthens their stems. A gentle, indirect airflow while you’re germinating helps maintain an even temperature. It prevents stagnant conditions, like too much moisture or humidity, which can lead to the formation of molds and fungus, not to mention pests.
Darkness
Seeds will only sprout when they think they’re buried and have everything they need to grow, like ideal temperature and access to water. For that reason, they need darkness to germinate. All seeds require a dark environment to trigger the plant to emerge. Storing your germinating seeds in the dark will help them grow. It’s easy to germinate your seeds directly in the growing medium. But if you’re not, make sure to keep them in the dark under consistent environmental conditions.
What are the best ways to germinate your seeds
Once your environment is dialed in, you can begin germinating your auto flower seeds. There are many ways to go about it, so be sure to choose one that suits your setup and preferences best.
Paper Towel Method
The paper towel method is popular due to its simplicity and high success rate. You may have employed this method in 2nd grade when you were learning about plants. To sprout seeds with paper towels, soak two paper towels with water and wring out any excess moisture to ensure they’re damp but not soaked. Place your seeds between them, then slide everything into a sandwich bag. From there, store it in the dark and make sure you’ve got a good temperature going. The seeds will sprout within 3-7 days.
Direct Soil Planting
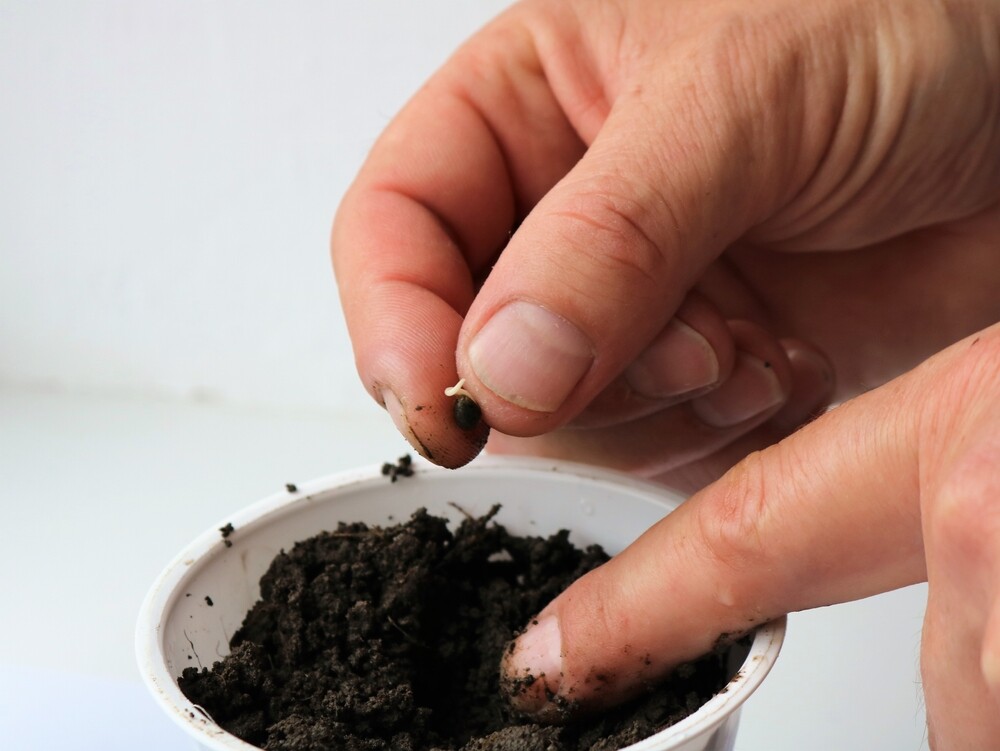
You can also germinate seeds directly in the soil or other growing medium they’ll live in after they sprout. It’s a natural option, but monitoring the seeds is harder. With direct seed planting, they may take longer to emerge if the soil is too basic or acidic, if it’s too wet or dry, or if the temperature beneath the surface is off. You may also inadvertently place the seed in the soil upside down, causing it to take longer to root and sprout.
The good news is that since it’s a more natural option, it saves your seedlings from stress when you transfer it from a paper towel into the growing medium. To do it, place the seed about a quarter inch deep into a quality potting mix, lightly cover it with soil, and gently water. The roots should sprout in 1-2 weeks under the right conditions.
Starter Cubes and Seedling Plugs
Starter cubes and seedling plugs offer a ready-made medium that retains moisture and can be directly transplanted into larger pots, making the transition from the seedling to the vegetative stage that much smoother. They can be used in both hydroponics systems and soil systems. To use them, start by saturating the plugs. Since most of them don’t contain nutrients, many growers will use rooting hormones to coax them out faster. From there, place the seed about a quarter inch into the cube or plug, place them in a tray with a lid, turn your lights on, and let them grow. With no hormones, they’ll sprout within 1-2 weeks.
Water Soaking
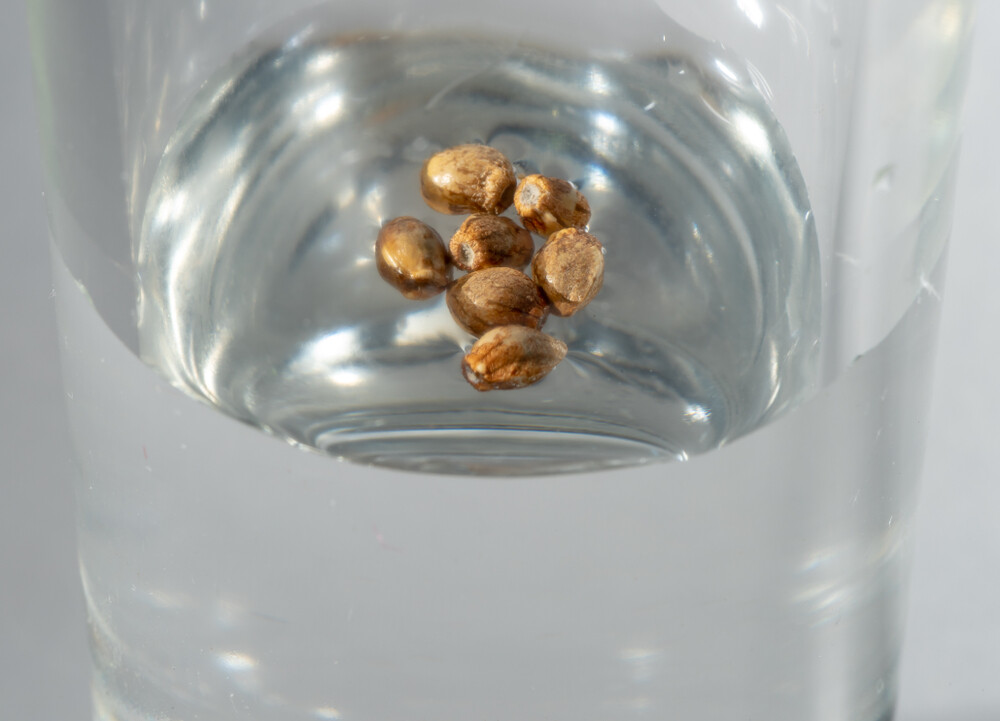
If you’re in a rush to get your seeds going, soaking them in water for 12-24 hours can hasten germination by a couple of days, though it can be risky. When the auto flower seeds sprout, they can be waterlogged and ruined quickly in this method, so unless you can keep a close watch on them, you might want to be patient and opt for a different method. If you do have the time and energy to monitor them closely, fill a glass with warm water, plop the seeds in, and wait for them to sink. They can be kept in a dark cupboard in the water for several days before sprouting, though it is recommended to plant them as soon as the taproot has emerged to prevent them from rotting or getting ruined.
Each of these methods, when done correctly, can yield excellent germination rates for autoflowering seeds, even as much as 90%. Just remember that the environment is everything. You’ll want to keep moisture, warmth, and darkness in check to ensure the best start for your seeds.
Autoflower Germination Tips
No matter which method you choose, there are a few other things you should consider to get the best possible results. Below are a few how-to guides to get you started.
How to germinate directly in soil
Germinating directly in soil (or other growing medium) is pretty straightforward. Select a pot with drainage holes and fill it with a light, seedling-friendly soil mix. Ideally, the mix should be mildly pre-fertilized and have a pH of around 6, but no additional nutrients should be added as the soil will have enough nutrients for the seedlings to survive the first three weeks. At which point, you’ll transplant it into a soil mix better suited for veg and flower.
Moisten the soil, make a small hole about a quarter inch deep, and place a single seed in it. Cover the seed gently with soil and keep it moist but not soaking wet. Since your seed is kept in darkness below the soil, you can place the pot under your grow lights before the seedling emerges.
How to germinate in between paper towels
For the paper towel method, wet two paper towels without soaking them. Place the seed between the damp towels and fold them to cover it. Put the folded towels in a plastic bag or, ideally, between two plates to retain moisture. Place in a warm, dark area, such as on top of a fridge or a slightly warm furnace, and check daily to ensure the towels remain moist until the seed sprouts.
How to germinate in rockwool or peat pellets
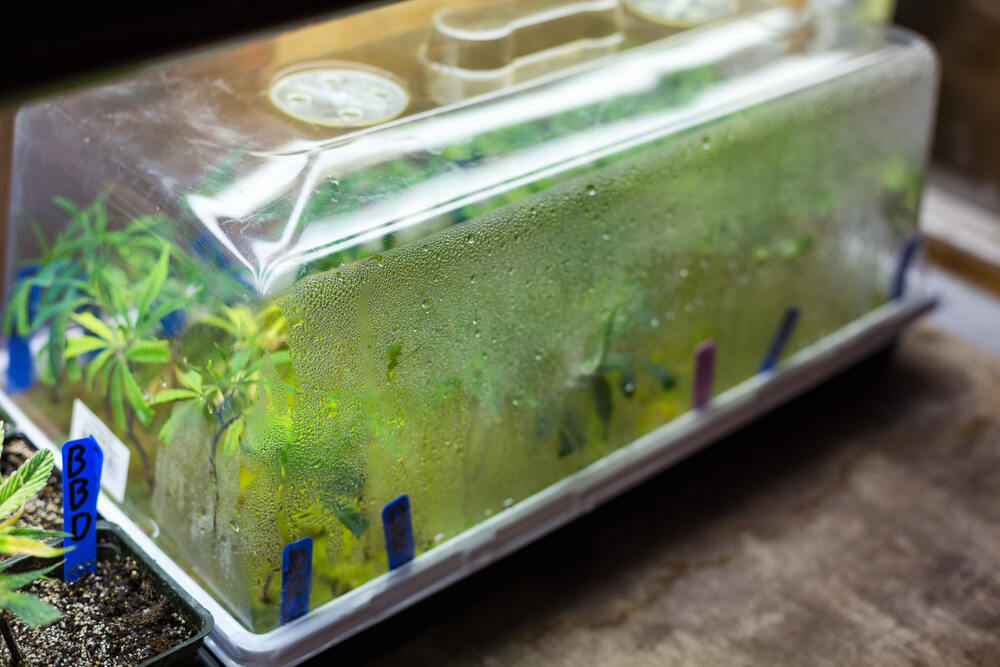
Soak rockwool cubes or peat pellets in water until fully saturated. Gently insert the seed into the cube or pellet to the recommended depth, usually around a quarter-inch. Place the cubes or pellets in a tray, cover them with a dome to maintain humidity, and keep them in a warm, dark area until germination. Once they sprout, you can place these plugs into larger ones to support the plant as it grows.
How to germinate in Rapid Rooters
Rapid Rooters are another reliable method to germinate cannabis seeds successfully. Just like rockwool cubes, they should be moistened before use. Insert the seed into the pre-made hole in the rooter. Place the rooter in a tray, and if possible, use a humidity dome to maintain the environment. Store the tray in a warm, dark place, ensuring the rooter stays moist until the seed sprouts.
How to germinate in water
Fill a glass with warm water and gently place the seeds inside. Seeds should soak for no longer than 24 hours, though they can survive up to a few days in water even after sprouting. After soaking, seeds that sink to the bottom are ready to be transferred to your chosen growth medium. Keep them in a warm, dark environment until the seedlings show signs of growth.
How to use a germination chamber
Like most things in the cannabis industry, we’ve optimized and automated germination. Germination chambers provide consistent environmental conditionals, making them an excellent choice for taking the stress out of monitoring your environment on your own. To use one, follow these steps:
1. Set Up the Chamber: Position your germination chamber in a location where the temperature can be steadily maintained, like a closet that isn’t opened often. Wipe down the inside with a clean paper towel and 70% isopropyl alcohol to remove any bacteria or contaminants.
2. Temperature Control: Most chambers have built-in thermostats that you can adjust to keep your seeds in the sweet spot of 68-77°F (20-25°C). Use it to monitor and adjust your temperatures to coax your seeds to grow. If yours doesn’t have one, use a digital thermometer and hygrometer to monitor temperatures, and employ a heat mat if necessary.
3. Humidity and Moisture: Maintain a humidity level around 70% inside the chamber. Some chambers have humidity controls, but if not, a tray of water or a humidifier can help. The chamber should keep the germination medium moist but not soggy.
4. Prepare the Medium: Whether using soil, rockwool, peat pellets, or any other medium, make sure it is properly moistened before placing it in the chamber.
5. Sow the Seeds: Stick the seeds in the medium, typically about a quarter-inch deep, and position them inside the chamber. If your chamber allows trays, you can germinate multiple seeds simultaneously.
6. Airflow and Ventilation: If the chamber has a ventilation system, adjust it to provide a gentle airflow. If it doesn’t, you can use a small fan to keep the air moving inside the chamber. Remember, stagnant air means your humidity can get out of control, or your temperatures can get too hot, leading to mold.
7. Darkness: Seeds do not require light to germinate, and some chambers have a cover to block light. Make sure that the seeds are kept in the dark until they begin to sprout, which usually takes a few days.
8. Monitoring: Regularly check the seeds for signs of germination, which should occur within a few days to a week. The key thing to remember is that environment is everything. If your temperature or humidity is off, be sure to adjust it.
All in all, germination chambers are a great way to manage your environment, which makes it more likely that the majority of your seeds will sprout. Once the seeds have popped and the seedlings have grown, they can be gradually introduced to light and eventually moved out of the chamber to continue their growth in a more natural environment.
How can I improve my germination success rate?
When you pay so much money for seeds, it can be discouraging when some don’t sprout. Sometimes, that’s natural— some seeds are just duds, which is why we always include a few extras in your order. However, if you want to give your seeds the best chance at germinating, here are a few pro tips.
Plant autoflowering seeds at the right depth
Planting seeds at the correct depth is crucial for successful germination. A lot of energy is stored in a tiny seed, but it isn’t infinite. When you plant your seeds too deep, they may not have enough power to break the growing medium’s surface and get the light they need to grow. Alternatively, planting too shallow can make it more difficult for them to root, leading to weaker plants that may not survive. Autoflowering seeds should be placed about a quarter inch deep in the growing medium.
Plant autoflowering seeds the right way up
Seeds have a top and a bottom; the radicle, which will become the root, emerges from the bottom. While seeds can correct themselves if planted upside down, remember they have a finite amount of energy at this stage of their life. If they have to expend a lot of energy to correct themselves to break the surface and photosynthesize or root deeply, they may not survive. Placing them the right way up can speed up germination and save you some stress at this early stage of the plant life cycle.
Don’t let your soil dry out
Consistent moisture is vital for germination. The soil should always be kept moist, but it should never be saturated. You can check it by touching it. If it’s damp ¼” deep, you’re okay. But if it isn’t, it should get some water. Check the soil daily, especially if not using a germination chamber, to ensure it has not dried out.
Scarify your seeds
Scarification involves lightly scratching the seed’s outer shell to help the radicle emerge more easily. This can be done with a piece of fine sandpaper or a file, but be gentle to avoid damaging the seed. This is a controversial method that we don’t recommend for beginners as it can be seen as a desperate attempt to force a seed into germination physically. In cases where the seed won’t pop in other methods, the simple soak method can produce the same effect. It might speed germination up when done properly, but it’s not worth the risk of damaging your seeds.
Check the pH of your water
Just as seeds need perfect soil conditions, the pH of the water you use can slow down germination. Cannabis seeds typically prefer a water pH range of 5.5 to 7.0. pH levels outside of this range can cause a lot of problems, preventing your plant from absorbing certain nutrients or leading to mineral buildups that can rot your roots. Use a pH meter to test your water and adjust it, if necessary, with pH up or down solutions.
How long do autoflowering seeds take to germinate?
All cannabis seeds including autoflowers typically take anywhere from 3 to 10 days to germinate. However, it may take more or less time, depending on the quality of the seeds, plant genetics, the growing conditions, and the germination method used. Providing an optimal environment with the right temperature, humidity, and moisture can help give your seeds their best shot at germinating. Just keep in mind that monitoring your seeds and adjusting them as necessary is crucial to get the best possible success rate.
What is the best soil for germinating autoflower cannabis seeds?
The best soil for germinating cannabis seeds is a light, airy, and well-draining mix to prevent waterlogging and encourage oxygen flow to the seeds. A soil or other suitable medium with a balanced pH, typically between 6.0 and 7.0, is ideal, allowing seedlings to absorb nutrients effectively. Look for soil that contains a mix of peat moss, perlite, and vermiculite, promoting moisture retention while providing good drainage.
For autoflowering seeds, we recommend avoiding nutrient-rich or “hot” soils at the start, as the high nutrient content can overwhelm and burn delicate seedlings. Instead, opt for a seed-starting mix or a light potting soil with a gentle nutrient start, better suited for the initial stages of an autoflower seed’s growth. Once seedlings have established themselves, they can be transplanted into a more nutrient-dense soil to support their rapid growth phase.
Do autoflowers require light to germinate?
Autoflowers, like most seeds, do not require light to germinate. The germination process is triggered by moisture, warmth, and darkness. Light becomes crucial only after the seed has sprouted and the seedling begins to grow. At that point, the young plant needs light to perform photosynthesis. During the initial germination stage, your focus should be on maintaining the ideal environment and ensuring the growing medium is adequately aerated. Only after the seedlings emerge and the first leaves appear should they be exposed to light to support normal, healthy growth.
What is the best temp for autoflower germination?
The best temperature for germinating your seeds is within the range of 68-77°F (20-25°C). This range provides the warmth that seeds need to activate enzymes that trigger germination. Maintaining a consistent temperature within this range is important, as fluctuations can slow down the germination process or decrease the success rate. A heat mat or other warmth-generating appliance can help maintain this temperature, especially in cooler environments.
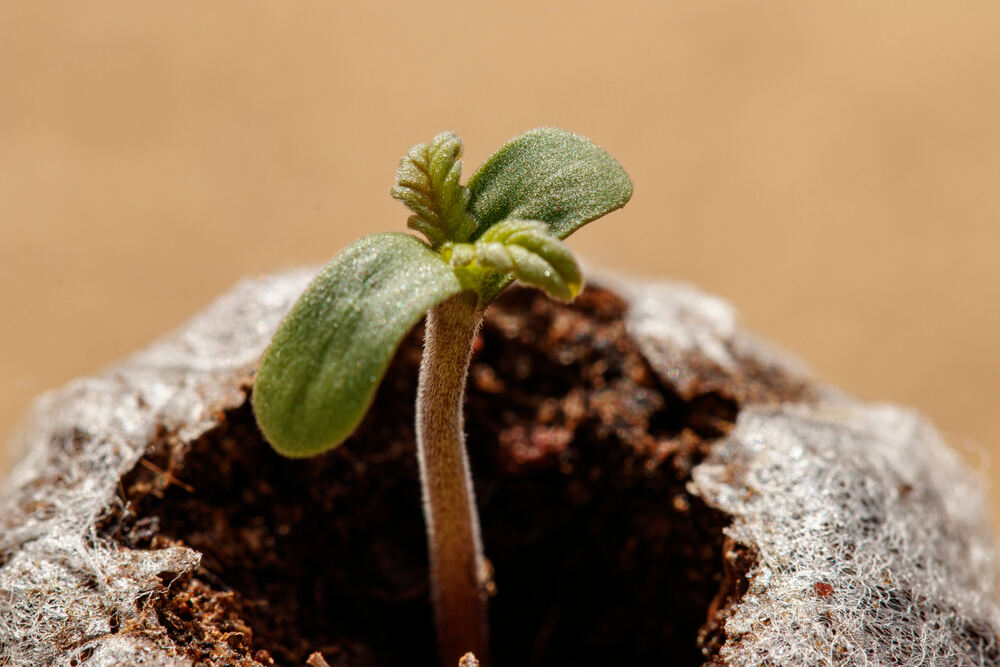
How long is the seedling stage for Autoflowers?
The seedling stage for autoflowers typically lasts between 2 to 3 weeks, depending on the variety and genetics. During this time, the plants develop their initial set of leaves and establish a root system. As autoflowering plants transition quickly from the vegetative to the flowering stage, ensuring they have the right conditions from the get-go is important, as this early stage sets the foundation for their entire lifecycle. After the seedling stage, they will automatically start to enter the vegetative phase without the need to change the light cycle in any way whatsoever, which is a unique characteristic of auto-flowering varieties.
Conclusion
Germinating autoflowers isn’t much different from germinating any other seed. Now that you’ve got the know-how to create the perfect germination conditions, you’re ready to sow those seeds with confidence. Your next lush crop is just a seed away— so get out there and get started! We’re excited to see what you’ve grown. Oh, and by the way, if you found this guide helpful, don’t forget to like, share, and drop a comment to let us know how it went for you. We’re always happy to help.