
Grasshoppers on Outdoor Autoflowers: How to Protect Your Plants
Grasshoppers do eat outdoor autoflowers, feeding on leaves, tender stems, and new growth throughout the growing season. While established plants can tolerate occasional chewing, seedlings and young autoflowers are especially vulnerable because their short vegetative stage leaves little time to recover from early leaf loss. Left unchecked, repeated feeding can slow plant development and reduce final yields. Fortunately, grasshopper damage is easy to identify and, with the right approach, straightforward to manage. This guide explains how to identify grasshopper damage on outdoor autoflowers, remove grasshoppers safely, prevent future infestations, and protect your plants throughout every stage of their lifecycle.
Article Insights
- Grasshoppers do eat cannabis plants, mainly by chewing leaves, soft stems, and new growth.
- Seedlings and young vegetative plants are most vulnerable because they have limited leaf mass.
- Grasshopper damage usually appears as irregular holes, jagged leaf edges, and missing sections of fan leaves.
- Mature plants can often recover from minor feeding, but repeated damage may slow growth and reduce vigor.
- Physical barriers, regular inspections, and clean garden management are commonly used to reduce grasshopper pressure.
- Grasshopper damage is different from sap-feeding pests like whiteflies, broad mites, and mealybugs because it removes plant tissue directly.
- Do Grasshoppers Eat Autoflower Plants and Why They Target Them
- How to Identify Grasshopper Damage on Outdoor Autoflowers Before It Becomes Severe
- When Grasshopper Damage Becomes Serious on Outdoor Autoflowers
- How to Get Rid of Grasshoppers From Outdoor Autoflowers
- How to Prevent Grasshoppers From Returning to Outdoor Autoflowers
- Conclusion
- Frequently Asked Questions About Grasshoppers on Outdoor Autoflowers
Grasshoppers are one of many common cannabis pests that can damage outdoor plants and reduce yields. While they are easier to spot than many sap-feeding insects, their ability to remove large amounts of leaf tissue quickly makes them a pest worth taking seriously. Understanding how grasshoppers behave, the damage they cause, and how they compare to other cannabis pests will help you protect your plants more effectively throughout the growing season.
Do Grasshoppers Eat Autoflower Plants and Why They Target Them
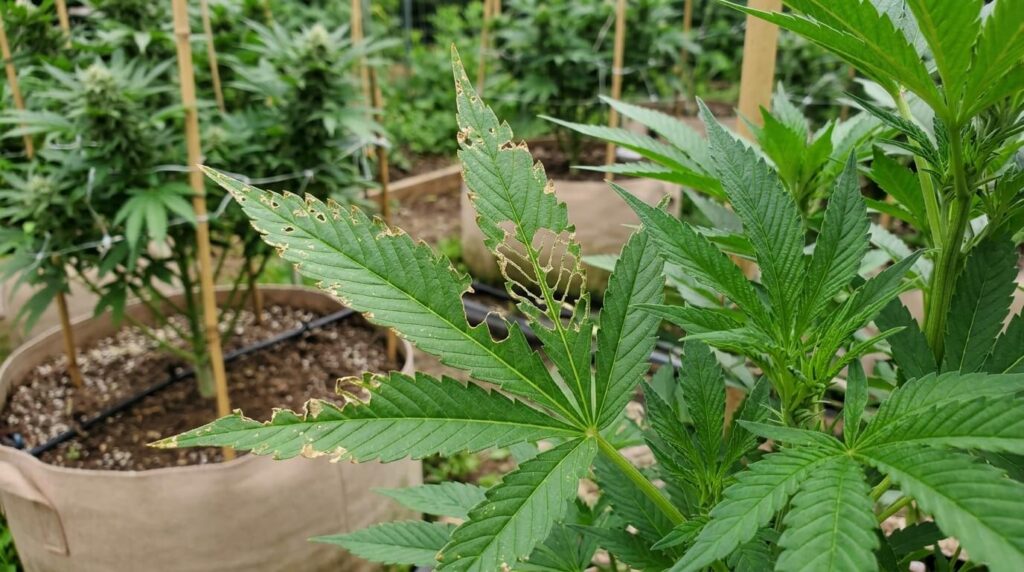
Outdoor autoflowers are particularly vulnerable to grasshopper damage because they have a short vegetative window to build the leaf mass needed for healthy flowering. Unlike photoperiod cannabis, autoflowers cannot extend their vegetative stage to recover from early defoliation. If leaves are lost during the first few weeks of growth, the plant has limited time to replace them before flowering begins, making early protection essential.
Grasshoppers are opportunistic herbivores that readily feed on cannabis when it is available. They are not attracted specifically to cannabis, but they will consume tender leaves, fresh shoots, and soft stems whenever nearby vegetation becomes scarce or environmental conditions favour feeding. Outdoor autoflower seeds are often grown in gardens surrounded by grasses, weeds, hedgerows, or unmanaged fields, where grasshopper pressure is naturally higher than in enclosed growing spaces.
Do Grasshoppers Eat Cannabis and What Attracts Them to Cannabis Plants?
Yes. Grasshoppers will readily feed on outdoor cannabis, especially during warm, dry weather when surrounding vegetation begins to dry out. Young autoflowers are often among the first plants they target because their foliage is soft, nutrient-rich, and easy to chew.
Several conditions increase the likelihood of feeding:
- Tender new growth
- Soft fan leaves
- Warm, dry conditions
- Nearby grasses and unmanaged weeds
- Limited natural food sources during drought
After several outdoor autoflower seasons, I’ve found that the highest feeding pressure usually occurs during the first two to three weeks after emergence. At this stage, even moderate chewing can noticeably slow development because every healthy fan leaf contributes to the rapid vegetative growth that determines the plant’s final size. Once stems harden and the canopy fills out, occasional feeding becomes far less significant.
Although cannabis is not considered a grasshopper’s preferred food source, large populations quickly become opportunistic. A single insect is unlikely to kill a healthy plant, but repeated feeding on seedlings or young autoflowers can permanently reduce plant size and final yield before the flowering phase even begins.
Do Grasshoppers Eat Cannabis Plants During Every Growth Stage?
Grasshoppers can feed on autoflowers throughout their entire lifecycle, but the consequences vary depending on the plant’s stage of development. The greatest risk occurs during the seedling and early vegetative stages, when plants have limited foliage and every leaf plays an important role in building energy reserves for flowering.
| Cannabis Growth Stage | Grasshopper Risk Level | Typical Damage |
| Seedling | Very High | Chewed leaves, damaged stems, stunted growth |
| Early Vegetative | High | Heavy leaf feeding and reduced growth |
| Late Vegetative | Moderate | Loss of fan leaves and slower development |
| Early Flowering | Moderate | Leaf damage that reduces photosynthesis |
| Late Flowering | Low to Moderate | Primarily leaf feeding with limited bud damage |
Because autoflowers begin flowering according to age rather than changes in daylight, they have very little opportunity to recover from early defoliation. A photoperiod plant can often compensate by remaining in vegetative growth for another week or two, but an autoflower continues progressing through its lifecycle regardless of the damage it has sustained. Protecting leaf area during the first month of growth is therefore one of the most effective ways to preserve yield potential.
Why Young Autoflowers and Seedlings Are Most Vulnerable
If you’re growing autoflower seeds for beginners, protecting seedlings during the first few weeks is especially important because their tissues are soft, their root systems are still developing, and they have very little stored energy. Losing only a few leaves can remove a substantial percentage of the plant’s total photosynthetic capacity at the exact stage when rapid growth is most important.
Whenever I move autoflowers outdoors, I inspect them every morning during the first three weeks. Grasshoppers are easier to spot while temperatures remain cool, allowing them to be removed before feeding begins. More importantly, this is the stage where a single day’s damage can have lasting consequences. Once flowering starts, the plant’s priority shifts from producing new foliage to developing flowers, leaving little opportunity to replace lost leaf mass.
One pattern we’ve seen while evaluating outdoor autoflower cultivars is that plants slowed by early pest damage rarely “catch up” later in the season. Even when healthy new growth returns, the reduced canopy established during the first few weeks often limits the plant’s final size compared to unaffected plants growing under the same conditions.
Are Grasshoppers Worse Than Other Outdoor Cannabis Pests?
Many growers spend considerable time looking for spider mites, aphids, or whiteflies because these pests are difficult to detect. Grasshoppers, however, deserve equal attention for a different reason—they remove healthy plant tissue immediately instead of gradually weakening the plant through sap feeding.
Unlike aphids, mealybugs, whiteflies, or broad mites, which often cause yellowing leaves and distorted growth over time, grasshoppers leave obvious chewing damage that can remove large sections of foliage within hours. For autoflowers, where every day of vegetative growth matters, that rapid loss of leaf area can have a much greater impact than slower-moving pest infestations.
| Pest | Type of Damage | Speed of Damage | Visibility |
| Grasshoppers | Chewing leaves and stems | Fast | Easy to spot |
| Whiteflies | Sap feeding | Slow | Moderate |
| Broad Mites | Distorted growth | Moderate | Difficult |
| Mealybugs | Sap feeding | Slow | Moderate |
| Cannabis Caterpillars | Chewing buds and leaves | Fast | Moderate |
| Aphids | Sap feeding | Slow | Easy |
Learning to distinguish chewing damage from sap-feeding insects, including leafhoppers on cannabis, allows you to choose the right control method more quickly. In my experience, growers who inspect young outdoor autoflowers daily during their first month rarely experience serious grasshopper damage, even in areas where these insects are common throughout the growing season.
How to Identify Grasshopper Damage on Outdoor Autoflowers Before It Becomes Severe
For outdoor autoflowers, identifying grasshopper damage during the first few days of feeding can make the difference between harvesting a vigorous plant and one that never reaches its full potential. Unlike photoperiod cannabis, autoflowers don’t have extra weeks to replace damaged foliage. Once flowering begins, the opportunity to rebuild lost leaf mass is largely gone, making early identification one of the most valuable pest management skills an outdoor grower can develop.
After several outdoor autoflower seasons, I’ve found that growers who inspect plants for just a few minutes every morning during the first month rarely experience enough grasshopper damage to reduce yields. The key isn’t simply finding the insect, it’s recognising the first signs of feeding before significant defoliation occurs.
What Grasshoppers Look Like and Where They Hide
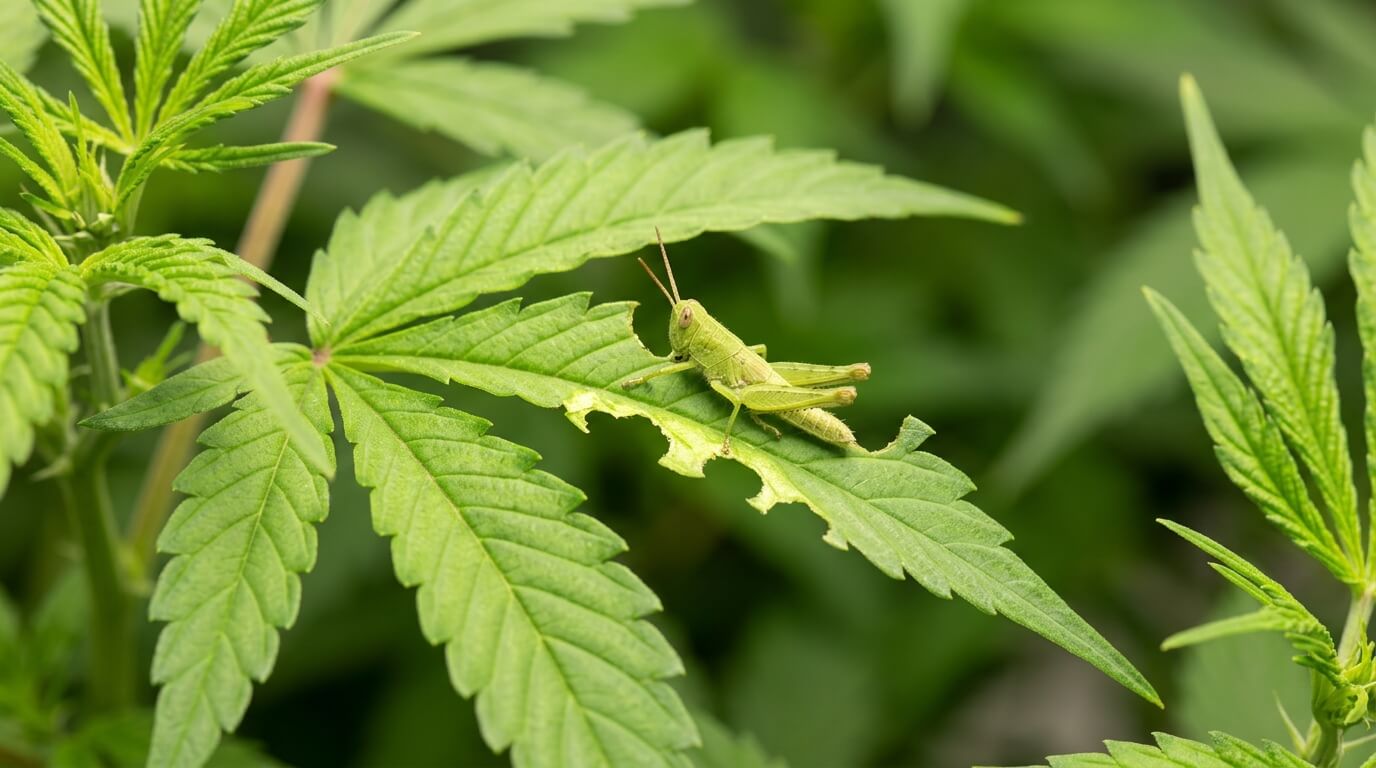
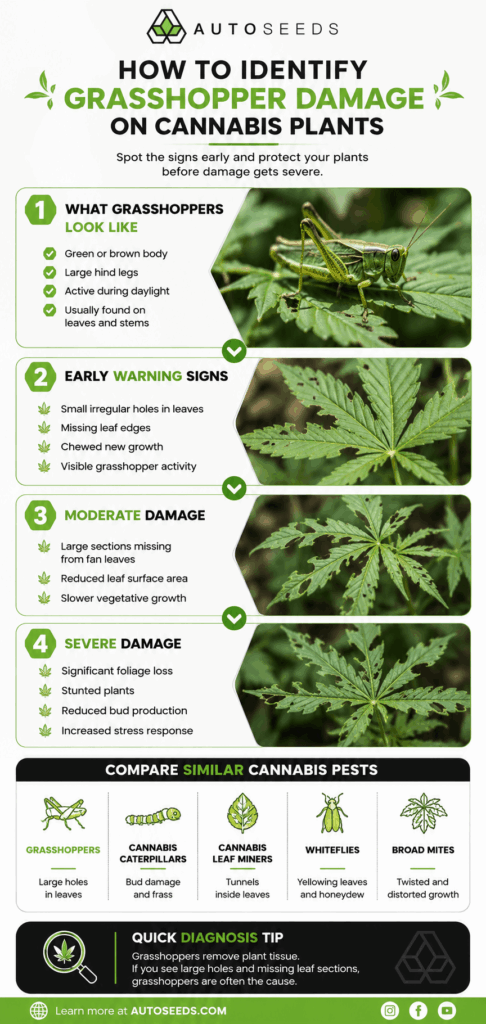
Grasshoppers are one of the easiest outdoor cannabis pests to identify. Adults vary in size depending on the species, but most have long bodies, powerful hind legs for jumping, folded wings, and green, brown, or tan colouring that blends naturally into surrounding vegetation.
Look for:
- Large hind legs designed for jumping
- Long, narrow bodies with folded wings
- Green, brown, or tan camouflage
- Strong chewing mouthparts
Rather than beginning your inspection on the plant itself, start with the surrounding environment. In my experience, grasshoppers usually rest on nearby grasses, weeds, fence lines, or ground cover before moving onto young autoflowers to feed. As temperatures rise during the morning, they become much more active and quickly jump between plants, making them harder to spot.
I’ve found sunrise to be the best inspection time. Cooler temperatures slow their movement, allowing you to remove them before they begin feeding. If a grasshopper suddenly jumps from nearby vegetation as you approach your plants, inspect that autoflower carefully for fresh chewing damage.
How to Identify Grasshopper Damage on Autoflower Leaves
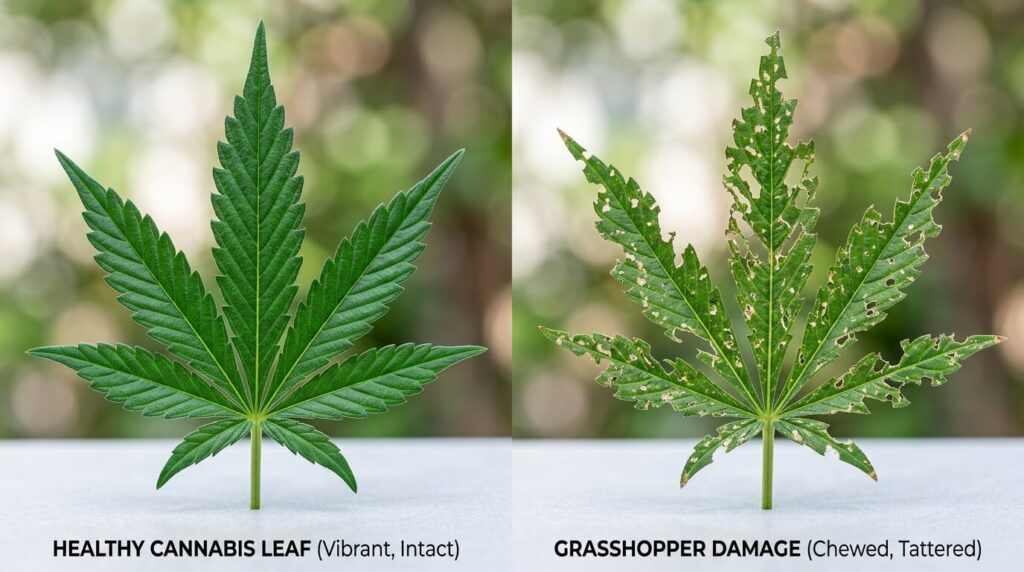
The easiest way to identify grasshopper damage is to look for missing plant tissue rather than changes in colour. Grasshoppers physically remove healthy leaf material, so the remaining tissue stays green while sections of the leaf simply disappear.
When inspecting young autoflowers, follow this routine:
Step 1: Check the first true fan leaves. Grasshoppers usually begin feeding on the largest exposed leaves rather than the cotyledons. Small, irregular bite marks along the outer edges are often the first sign of activity.
Step 2: Examine the leaf margins. Unlike nutrient deficiencies, which gradually discolour foliage, grasshopper damage creates uneven holes, jagged edges, and missing sections that appear almost overnight.
Step 3: Inspect new growth. If feeding continues, you’ll often find partially eaten leaves or bite marks on tender shoots near the top of the plant.
Step 4: Look beneath the plant and nearby vegetation. Adult grasshoppers often remain close to the food source and may still be resting nearby during early morning inspections.
Typical symptoms include:
- Large irregular holes in fan leaves
- Missing sections along leaf edges
- Jagged chewing marks
- Damaged new shoots
- Fresh bite marks on tender stems
On young autoflowers, even relatively minor chewing can have a noticeable impact. Those first fan leaves provide much of the energy needed during the plant’s rapid vegetative phase, so losing leaf area early often slows canopy development before flowering begins.
How Grasshopper Damage Progresses on Autoflowers
Grasshopper feeding usually follows a predictable pattern, making early diagnosis easier if you inspect plants regularly.
Early feeding (Day 1–2)
- One or two irregular holes appear on exposed fan leaves.
- Leaf tissue remains healthy and green around the damage.
- Growth continues normally.
Moderate feeding (Day 3–5)
- Multiple fan leaves show chewing.
- Larger sections of leaf margins are missing.
- New growth begins showing bite marks.
- Plant growth may begin slowing.
Heavy feeding (One week or longer)
- Significant leaf area has been removed.
- Canopy development slows noticeably.
- Side branching may become less vigorous.
- Young autoflowers often appear smaller than unaffected plants of the same age.
Recognising these stages allows you to intervene before yield potential is affected.
How to Tell the Difference Between Grasshopper Damage and Cannabis Caterpillars
Grasshoppers and caterpillars both chew plant tissue, but they leave behind different clues.
| Characteristic | Grasshoppers | Cannabis Caterpillars |
| Main Target | Leaves and stems | Buds and flowers |
| Damage Pattern | Large irregular holes | Chewed flowers and leaves |
| Droppings Present | Rarely | Common (frass) |
| Activity Period | Mostly daytime | Often hidden |
| Ease of Identification | Easy | Moderate |
One of the easiest ways I distinguish between them is by watching how the plant reacts when I approach. Grasshoppers almost always jump from the plant or nearby weeds before I touch it. Caterpillars do the opposite—they remain hidden beneath leaves or inside flowers until damage becomes much more obvious. If your autoflowers have large bite marks but no frass, grasshoppers are usually the more likely culprit.
Grasshopper Damage vs. Whiteflies, Broad Mites, Mealybugs, and Scale Insects
Sap-feeding pests create a completely different set of symptoms than chewing insects.
Whiteflies often cause:
- Yellowing foliage
- Sticky honeydew deposits
- Reduced vigour
Broad mites typically produce:
- Twisted new growth
- Deformed leaves
- Stunted development
Mealybugs and scale insects usually result in:
- Sticky residue
- Yellowing leaves
- Gradual loss of vigour
- Slow decline over several weeks
Grasshoppers behave differently because they remove healthy leaf tissue immediately. Instead of gradual symptoms, you’ll find fresh holes, missing leaf sections, and jagged chewing damage while the remaining foliage stays green.
For autoflowers, that distinction is especially important. A microscopic pest may weaken a plant slowly over time, but grasshoppers can remove enough leaf area in just a few days to permanently reduce canopy size before flowering begins. Correctly identifying the cause of the damage also ensures you choose the right solution. Fine mesh barriers or hand removal work well against grasshoppers, whereas sap-feeding pests often require completely different management strategies.
When Grasshopper Damage Becomes Serious on Outdoor Autoflowers
Finding a few chewed leaves doesn’t automatically mean your harvest is in danger. The real concern isn’t the presence of grasshoppers, it’s whether feeding continues long enough to slow plant development. Knowing when damage has crossed from cosmetic to yield-limiting helps you decide whether continued monitoring is enough or if it’s time to intervene.
Minor Damage: Continue Monitoring
Most healthy outdoor autoflowers tolerate light feeding surprisingly well. One or two damaged fan leaves, particularly on established plants, rarely justify immediate treatment if fresh chewing doesn’t continue.
Minor damage typically includes:
- A few irregular holes on older fan leaves
- No damage to the growing tip
- Healthy daily growth
- No new feeding during subsequent inspections
When I see this level of damage, I usually increase my morning inspections rather than reaching for pest controls. If the damage doesn’t progress, the plant often continues developing normally.
Moderate Damage: Time to Take Action
The situation changes when fresh feeding appears every day or multiple leaves begin disappearing within a short period.
Signs that intervention is worthwhile include:
- New bite marks appearing on consecutive mornings
- Several upper fan leaves damaged
- Chewing spreading to fresh growth
- Plant growth noticeably slowing compared to nearby autoflowers
After several outdoor autoflower grows, I’ve found that repeated feeding during the first month has a much greater effect than a single episode of chewing. Once new damage appears consistently, I don’t wait for the problem to resolve itself.
Severe Damage: Protect the Plant Immediately
Severe infestations are uncommon, but they can quickly reduce the performance of young autoflowers.
Immediate action is recommended if you notice:
- The main growing tip has been chewed
- Large sections of the canopy have disappeared
- Most upper fan leaves have significant damage
- Continuous daily feeding despite previous removal efforts
At this stage, delaying treatment usually allows the infestation to worsen, making recovery much more difficult.
Will an Autoflower Recover?
Recovery depends less on how many leaves were damaged and more on when the feeding occurred.
From my experience, outdoor autoflowers that suffer only minor leaf damage after stretch often finish with little noticeable reduction in harvest quality. Plants damaged before they have established a healthy canopy, however, usually remain smaller throughout the rest of their lifecycle, even after the grasshoppers are removed.
One of the easiest ways to judge recovery is by watching the plant rather than the damaged leaves. Healthy recovery is usually marked by vigorous new growth, normal side branching, and the absence of fresh chewing. If growth stalls for several days or new leaves remain noticeably smaller than expected, continued feeding or accumulated stress is likely affecting development and further protection may be necessary.
One thing we’ve consistently seen during outdoor cultivar evaluations is that early grasshopper damage affects plant size much more than flower quality. Healthy plants usually continue flowering normally once feeding stops, but those that lose too much leaf area during early vegetative growth often finish with fewer flowering sites simply because they never had the opportunity to build the same canopy.
How to Get Rid of Grasshoppers From Outdoor Autoflowers
Once grasshoppers start feeding on outdoor autoflowers, the objective is simple: stop new feeding as quickly as possible while causing as little stress to the plants as possible. From my experience, the most successful approach isn’t finding a single “best” treatment—it’s using the right method at the right stage of the grow.
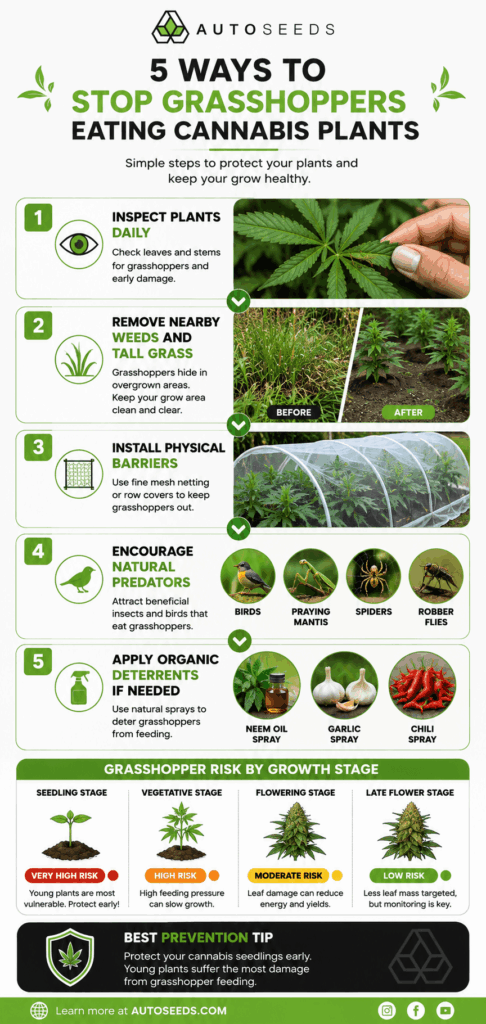
My Grasshopper Control Routine for Outdoor Autoflowers
Whenever I find grasshoppers on young autoflowers, I follow the same order of action.
| Priority | Action | Why It Comes First |
| 1 | Remove adult grasshoppers by hand | Immediately stops feeding |
| 2 | Install fine mesh protection | Prevents new insects reaching the plants |
| 3 | Reduce surrounding habitat | Lowers reinfestation pressure |
| 4 | Apply organic deterrents (vegetative growth only) | Discourages continued feeding if needed |
| 5 | Use stronger controls only as a last resort | Protects flower quality and beneficial insects |
Using this routine has consistently reduced grasshopper pressure in my outdoor autoflower grows without relying on repeated pesticide applications.
Remove Grasshoppers Before They Feed Again
Hand removal remains one of the quickest and safest ways to reduce small grasshopper populations.
I always inspect my autoflowers shortly after sunrise, when cooler temperatures make grasshoppers slower and easier to catch. Rather than looking at the plants first, I check nearby grasses and weeds because that’s where I usually find adults resting before they move onto fresh growth.
One practical lesson from our outdoor trial plots is that grasshoppers usually appear on surrounding vegetation before they move onto the plants themselves. Checking nearby grasses first often lets us remove them before fresh feeding begins, especially during warm, dry periods. I prefer physical barriers and environmental management because preserving flower quality becomes the priority.
During cultivar trials, we also avoid leaving seedling trays or recently transplanted autoflowers sitting beside unmanaged grass for several days. Newly established plants placed next to existing grasshopper habitat consistently receive more early feeding than plants moved into prepared growing areas.
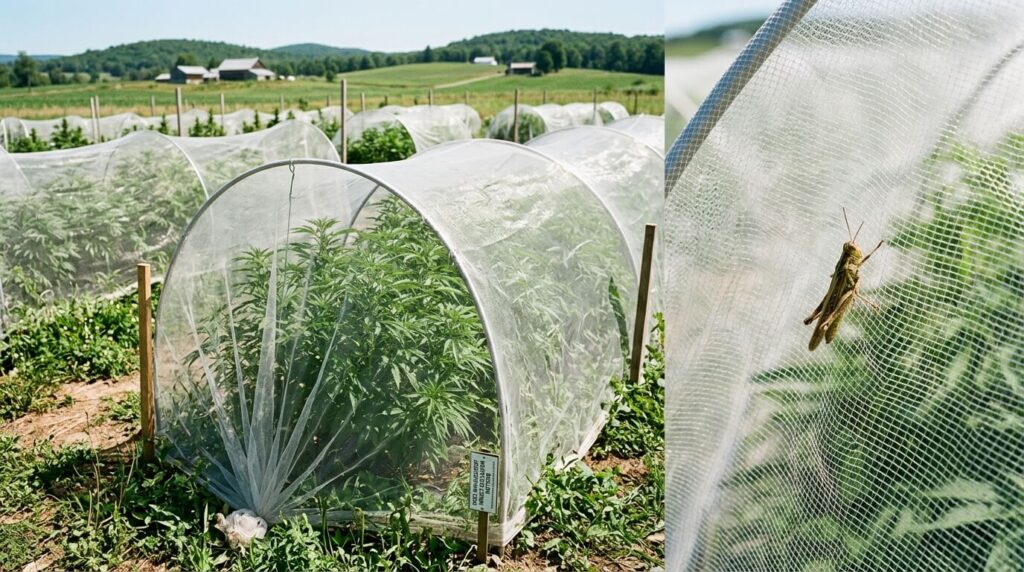
Protect Young Autoflowers With Fine Mesh Netting
If grasshoppers continue appearing, I install fine mesh insect netting as soon as possible.
For autoflowers, prevention is usually more effective than repeated treatments. Because these plants have a limited vegetative window, preventing another week of feeding is far more valuable than trying to encourage recovery later.
Fine mesh barriers:
- Prevent grasshoppers reaching new growth
- Allow light, airflow, and rain to pass through
- Leave no residue on developing flowers
- Continue protecting plants without repeated applications
For outdoor autoflowers, this is the control method I trust most.
Use Organic Deterrents Before Flowering
If physical removal and barriers aren’t enough, organic deterrents can help discourage feeding during vegetative growth.
Common options include:
- Neem oil
- Garlic spray
- Chilli-based deterrents
I only apply foliar deterrents before flowering begins. Once the first pistils appear, I stop spraying entirely and rely on physical protection instead. Keeping flowers clean is more important than chasing every remaining insect.
Reduce the Chance of Reinfestation
Getting rid of the grasshoppers already feeding on your plants is only half the job. Reducing the surrounding habitat helps stop new insects replacing them.
Simple improvements include:
- Mowing long grass around the grow
- Removing unnecessary weeds
- Clearing dense vegetation near containers or beds
- Keeping the growing area free of plant debris
I’ve consistently noticed fewer grasshopper problems in well-maintained outdoor gardens than in areas surrounded by unmanaged vegetation.
We’ve also found that keeping the area immediately surrounding containers free of weeds is often more effective than treating the entire garden. Grasshoppers typically move in from nearby cover, so reducing shelter around the plants themselves has the greatest impact.
When Stronger Controls Become Necessary
Most infestations can be managed using the routine above. If fresh feeding continues despite hand removal, barriers, and habitat management, consider products approved for edible crops and always follow the manufacturer’s directions.
For outdoor autoflowers, I treat stronger pest controls as the final option rather than the first. Acting early with simple, low-impact methods has consistently provided better long-term results while protecting flower quality through harvest.
How to Prevent Grasshoppers From Returning to Outdoor Autoflowers
The best way to deal with grasshoppers is to stop them becoming a problem before your autoflowers are established. After growing outdoor autoflowers through multiple seasons, I’ve found that prevention is far easier than trying to protect plants after repeated feeding has already started. Most successful prevention comes down to preparing the grow before plants go outside and adjusting your approach as the season progresses.
Before Transplanting Outdoor Autoflowers
Prevention starts before your autoflowers ever reach the garden.
Grasshoppers are far more likely to move into growing areas surrounded by long grass, weeds, and unmanaged vegetation. Preparing the site before transplanting reduces the likelihood of insects settling close to your plants.
One mistake we regularly see is transplanting healthy seedlings into areas that haven’t been cleared beforehand. Even vigorous autoflowers can suffer unnecessary early stress if they’re placed beside long grass or unmanaged weeds where grasshoppers are already active.
| Before Planting | Why It Helps |
| Mow surrounding grass | Removes shelter and breeding habitat |
| Remove large weeds | Reduces nearby food sources |
| Clear plant debris | Eliminates hiding places |
| Install netting supports | Makes protection quick if needed |
| Create clear access paths | Makes inspections and maintenance easier |
I’ve found that spending an hour preparing the garden before transplanting often prevents weeks of pest management later in the season.
Protect Autoflowers During the First Month
The first three to four weeks are the most important stage for prevention.
Rather than waiting until I see feeding damage, I assume grasshoppers will eventually find young autoflowers. If local populations are usually high, I install fine mesh protection as soon as seedlings have developed several true leaves or immediately after transplanting.
Because autoflowers have such a short vegetative period, preventing the first signs of feeding is usually far more effective than trying to recover from repeated leaf loss later.
During this stage I focus on:
- Keeping protective netting in place
- Removing nearby weeds as they appear
- Checking surrounding vegetation after hot, dry weather
- Maintaining healthy, vigorous plant growth
Adjust Your Prevention Strategy During Flowering
Once flowering begins, my priorities change.
By this stage, the canopy is established, so my focus shifts towards protecting flower quality rather than applying preventative sprays. I stop using foliar deterrents, leave physical barriers in place where practical, and continue maintaining the area around the grow to discourage new grasshopper activity.
This approach keeps developing flowers clean while still reducing the chances of late-season feeding.
Plan Around Seasonal Grasshopper Activity
Understanding when grasshopper populations are most active makes prevention much easier.
| Season | Grasshopper Activity | What I Do |
| Spring | Eggs hatch | Prepare the growing area and remove weeds |
| Early Summer | Populations begin increasing | Protect young autoflowers with mesh if pressure is expected |
| Mid Summer | Highest feeding pressure | Maintain barriers and tidy surrounding vegetation |
| Late Summer | Populations gradually decline | Continue garden maintenance until harvest |
Across multiple outdoor growing seasons, we’ve consistently noticed that the first significant increase in feeding follows prolonged hot, dry weather after nearby grasses begin to mature. Rather than waiting for damage to appear, that’s when we install protective netting over younger autoflowers if it isn’t already in place.
My Seasonal Prevention Routine
Every season I follow the same simple routine. I prepare the garden before transplanting, protect young autoflowers during their establishment phase, maintain the surrounding area throughout vegetative growth, and rely on physical protection instead of sprays once flowering begins.
That routine hasn’t eliminated grasshoppers completely, but it has consistently prevented them from becoming a serious problem. In my experience, outdoor autoflowers that are protected from the start rarely require more than routine maintenance to reach harvest with minimal pest damage.
Conclusion
Grasshoppers can damage outdoor autoflowers, but they do not have to threaten your harvest when managed early. Because autoflowers have a short vegetative window, preventing leaf loss during the first few weeks is far more effective than trying to recover later.
After several outdoor seasons, I’ve found the best results come from a simple routine: prepare the grow area before transplanting, protect young plants with fine mesh barriers when grasshopper pressure is high, and remove insects before feeding becomes established.
Healthy outdoor autoflowers depend on vigorous genetics, clean garden management, and proactive pest prevention. When plants establish quickly and feeding is controlled early, grasshoppers become a manageable nuisance rather than a serious threat to yield.
Frequently Asked Questions About Grasshoppers on Outdoor Autoflowers
Can one grasshopper ruin an outdoor autoflower?
Usually not. A single grasshopper is unlikely to cause serious damage unless it feeds on a very young seedling over several days. Problems typically develop when multiple grasshoppers remain active around the same plants and feeding continues unchecked during the first few weeks of growth.
Do grasshoppers eat autoflower buds?
Grasshoppers strongly prefer leaves and tender new growth. While they may occasionally nibble developing flowers if food is scarce, it’s uncommon for mature buds to become their primary food source. Most yield loss comes from early leaf damage rather than direct flower feeding.
Should I remove leaves that have been chewed?
Not unless they’re badly damaged or beginning to die. Even partially chewed fan leaves continue producing energy for the plant. I leave healthy green leaves in place and allow the autoflower to use them for as long as possible.
Do grasshoppers return every growing season?
In many outdoor growing regions, yes. Grasshopper populations naturally fluctuate depending on weather conditions, but areas that experience hot, dry summers often see recurring activity each year. That’s why I prepare my outdoor grow before transplanting instead of waiting for the first signs of feeding.
Will rain wash grasshoppers away?
Heavy rain may temporarily reduce grasshopper activity, but it rarely eliminates an established population. Once warm, dry conditions return, feeding usually resumes if suitable habitat remains nearby.
What’s the easiest way to protect outdoor autoflower seedlings?
From my experience, fine mesh insect netting provides the most reliable protection during the first month of growth. Combined with keeping surrounding vegetation under control, it prevents most grasshopper damage before it starts without affecting plant development.


