Autoflower Life Cycle Week By Week In Pictures
The reason why autoflowers are growing in popularity amongst home growers is the fact that they have shorter than usual life cycles. Because autoflowers contain ruderalis genetics, not only do they not require photoperiod light cycles but they’re typically ready to harvest in just 8-10 weeks. So, if you’re considering growing autoflowers or want a better breakdown on how to manage the autoflower timeline we’ve got the guide for you. Keep reading to learn autoflower life cycle week by week.
Autoflower week by week in pictures
Before we get into the timeline of how long do autoflower marijuana seeds take from start to finish, let’s brush up on the basics. Autoflowering varieties are specifically bred with ruderalis genetics. In the past, the cannabis ruderalis species grew wild in the world without specific periods of light like photoperiod strains.
Now, to make autoflower cultivation even more simple than it already is – let’s break down autoflower life cycle week by week.
Week 1: Autoflower Seedling Stage
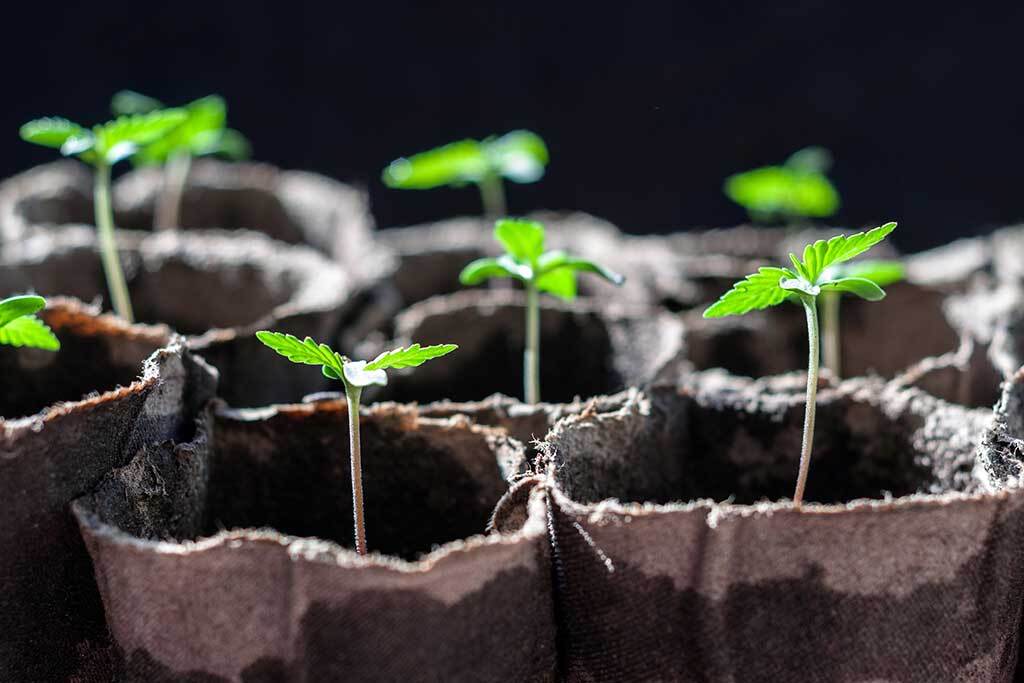
Just like most plants, the autoflower life cycle begins with the seedling. This is the tiny sprout that emerges from the seed once it’s germinated. As soon as the seedling appears, transfer it into the container you plan to grow the plant into full maturity. Since autoflowers are more sensitive than other cannabis species this avoids stressing your plant unnecessarily when transplanting later. In the first week, you should avoid feeding the seedling, too. As high levels of nutrients will be overwhelming for the plant and may result in burning.
Week 2: Early Veg Stage
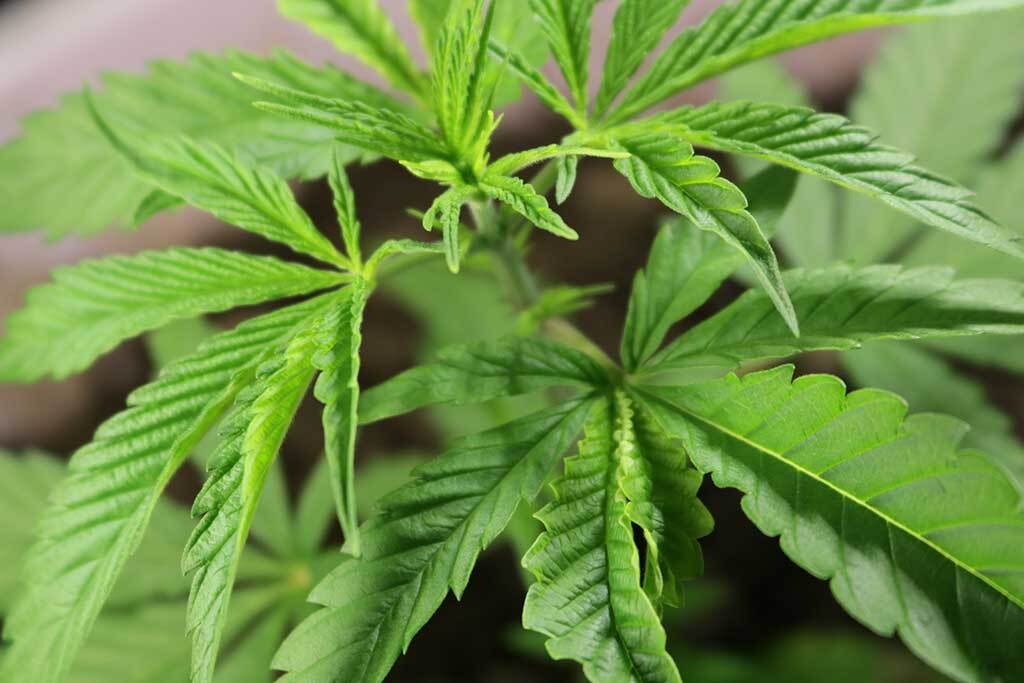
As soon as your seedling sprouts a couple of leaves your autoflower is in the early veg stage. Which typically occurs in week 2. At this point, you should still hold off feeding a regular level of nutrients. Many growers recommend reducing nutrients to a ¼ of the amount. During early veg you should also ensure your environment is running optimally. This means keeping relative humidity around 60% and temperatures at 71-82°F (22-28°C).
Weeks 3-4: Late Veg Stage
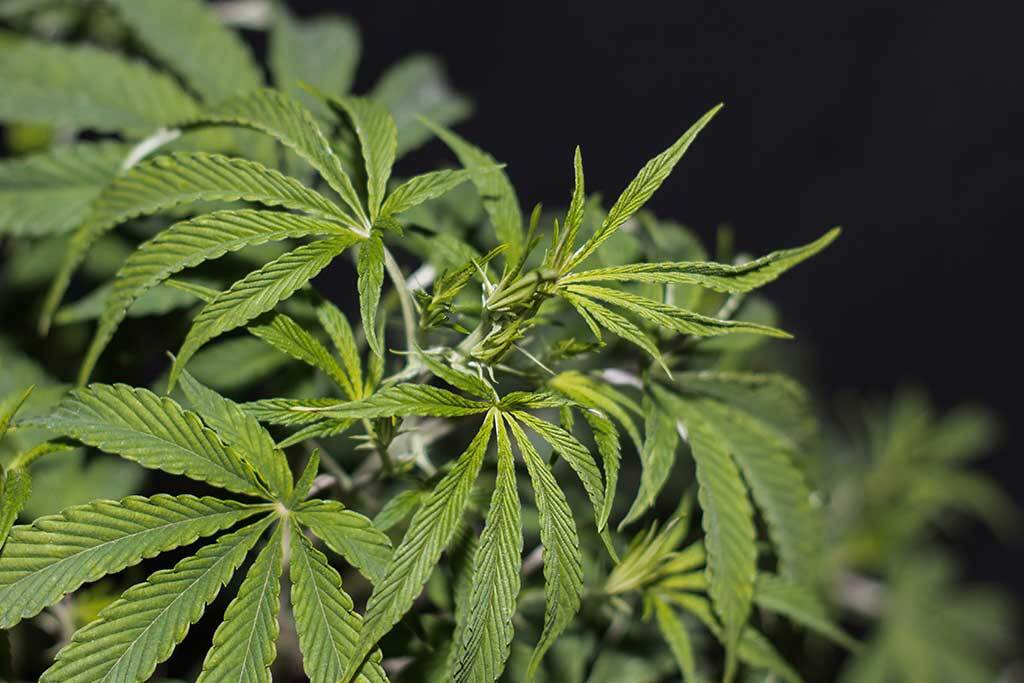 In weeks 3 and 4 you’ll watch your plants begin actively growing due to the roots being further developed. That means increasing nitrogen levels and making sure you’re giving crops enough phosphorus, potassium, and micronutrients at regular levels is optimal. Like regular plants double-check the height of your lights to make sure you avoid burning.. In the fourth week, you can begin implementing LST techniques to boost yields as well.
Week 5: Pre-Flowering Stage
In week 5 you’ll start seeing autoflower flowering stage signs. Including the sign of pistils or flowering sites changing in color. If your plant isn’t showing signs of flowering by week 5 there’s no need to worry. Some genetics mature differently than others. As soon as pre-flowering begins you can switch to a standard flowering feed. If you’re growing with LED lights when your plants start to flower it’s ideal to switch the spectrum from blue to red. This promotes stretching of the plant for bigger results in the end and nurtures bud growth.
Weeks 6-8: Flowering Stage
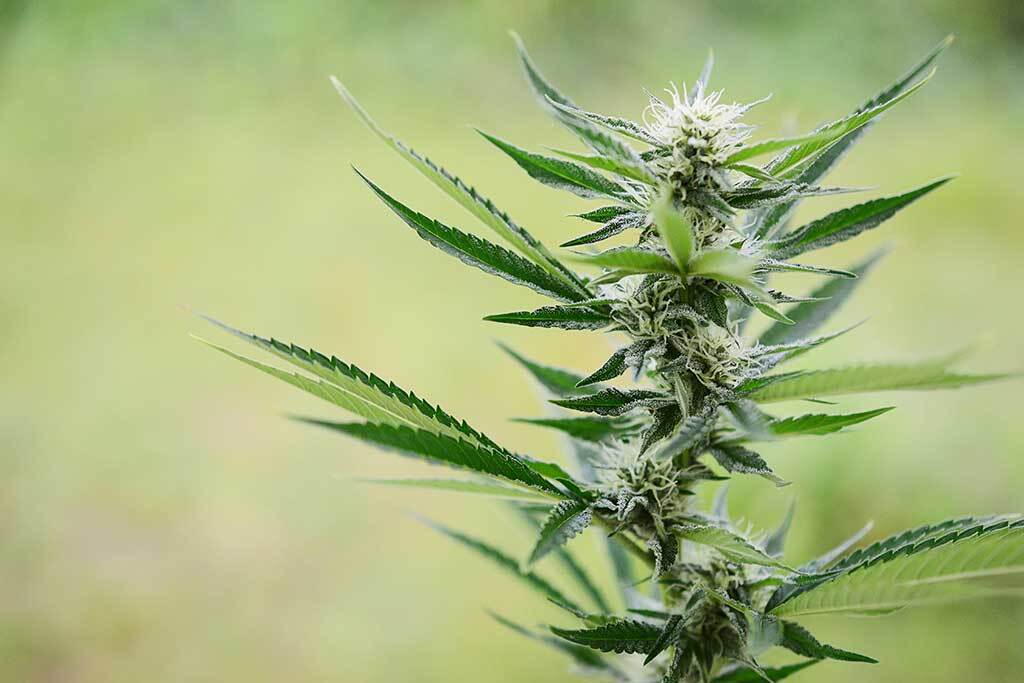
When the notorious white hairs start sprouting on your autoflower plant you’ll know you’re in the first part of flowering. This is when you should begin feeding with more phosphorus and potassium versus high levels of nitrogen in veg. Keep monitoring light heights and optimal environmental conditions. For the autoflower flowering stage relative humidity should be kept around 40-50% with temperatures at 68-79°F (20-26°C). These conditions are ideal for plant transpiration and photosynthesis to occur healthily. They’re also ideal for avoiding mold growth and you’ll want to continually monitor plants for pests, as well.
Around week 7, is when the plant buds take shape and start to pack on the weight. Avoid implementing any additional LST methods during this time as you won’t want to stress the plant at such a crucial time. Towards the end of week 8, you can adjust environmental conditions to 30-40% relative humidity and temps of 64-75°F (18-24°C) to prepare for the drying and curing stage to come.
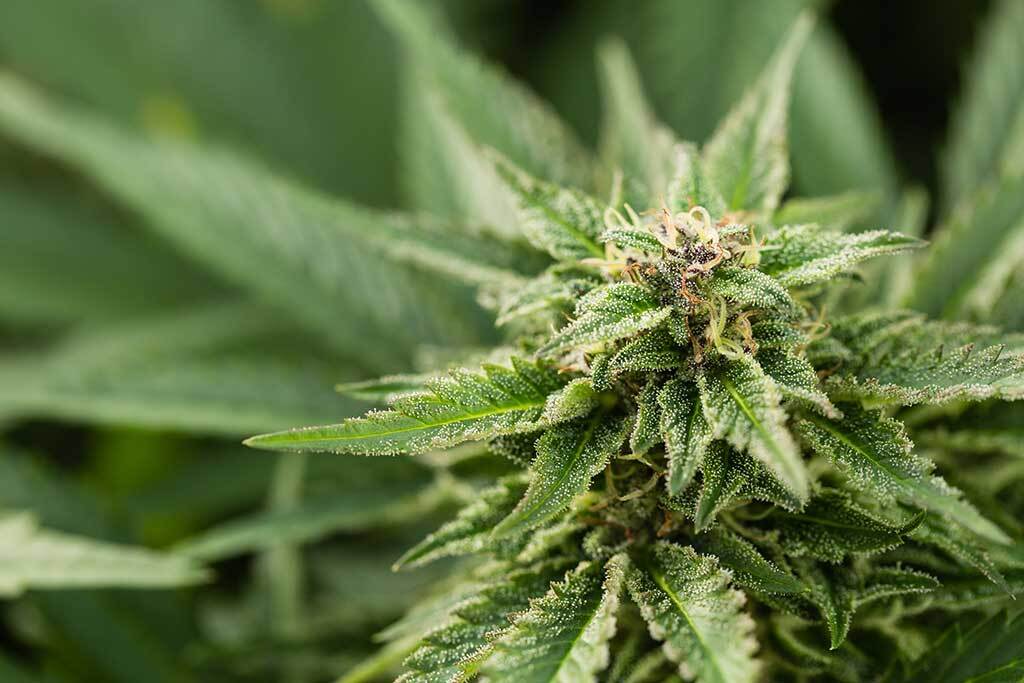
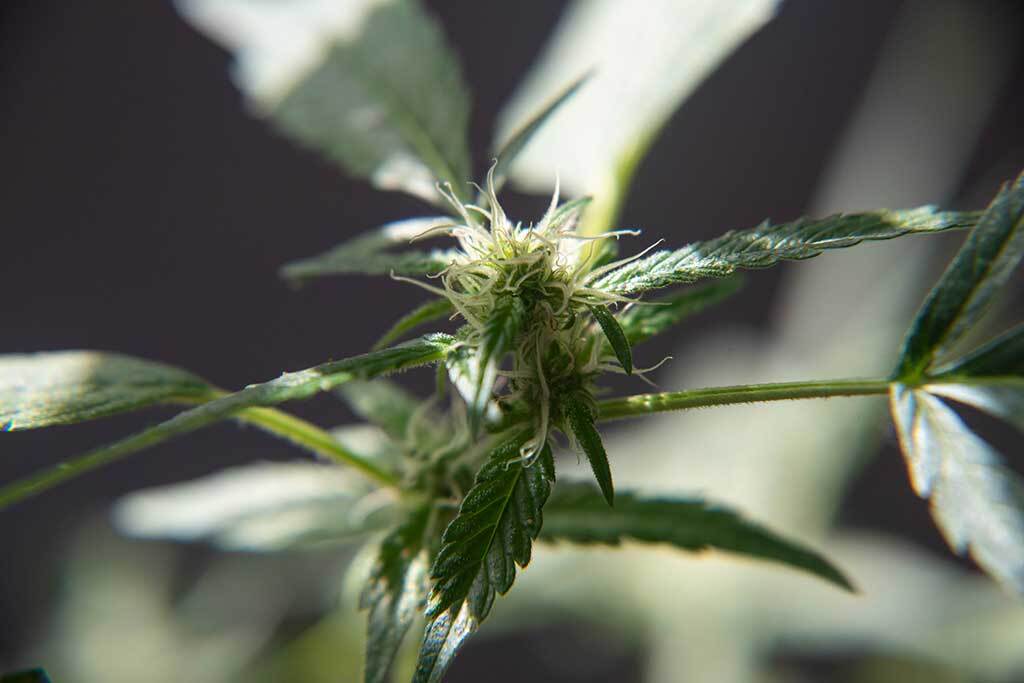
Weeks 9-10: End of Flowering Stage
Weeks 9 and 10 is when you’ll start to look for autoflower harvest signs. Doing so will ensure you don’t harvest too early, or too late which can detrimentally affect overall quality and potency. Autoflower harvest signs are the same as photoperiod signs. By watching the coloring and consistency of trichomes you can individually gauge when plants are ready to pull. The majority of white hairs will turn an orange amber color, and trichomes should be cloudy before turning amber for peak cannabinoid levels. Another autoflower harvest sign is yellowing leaves.
During the final couple weeks, you can halt feeding and start flushing. By giving your plant water only you’ll ‘flush’ out the nutrients and any chemicals used throughout the process for improved flavor and taste.
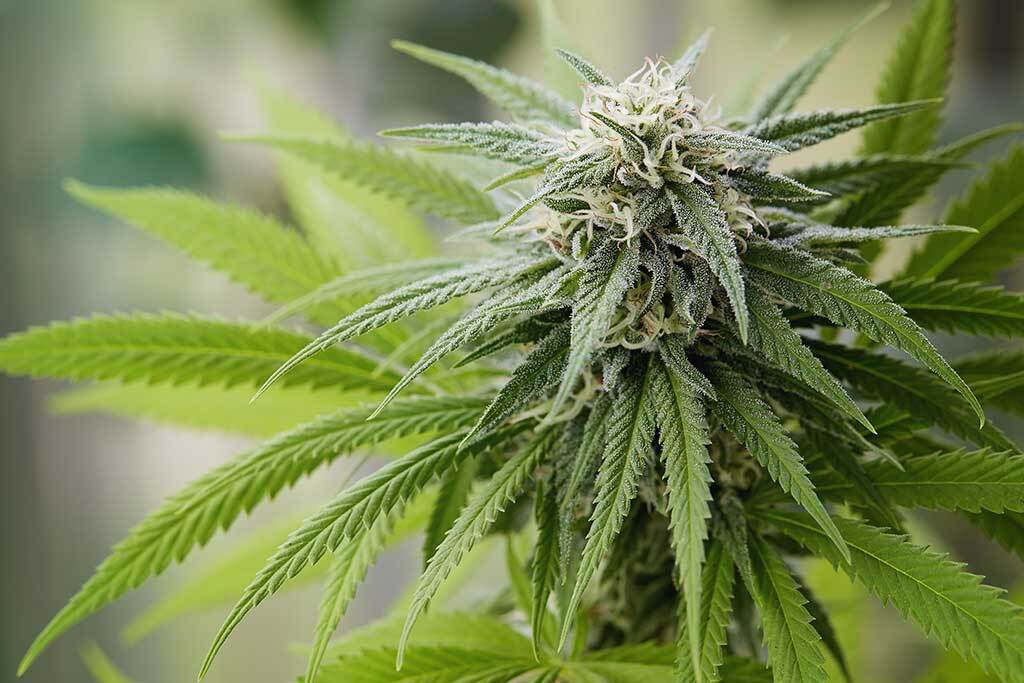
Weeks 10-11: Harvest time
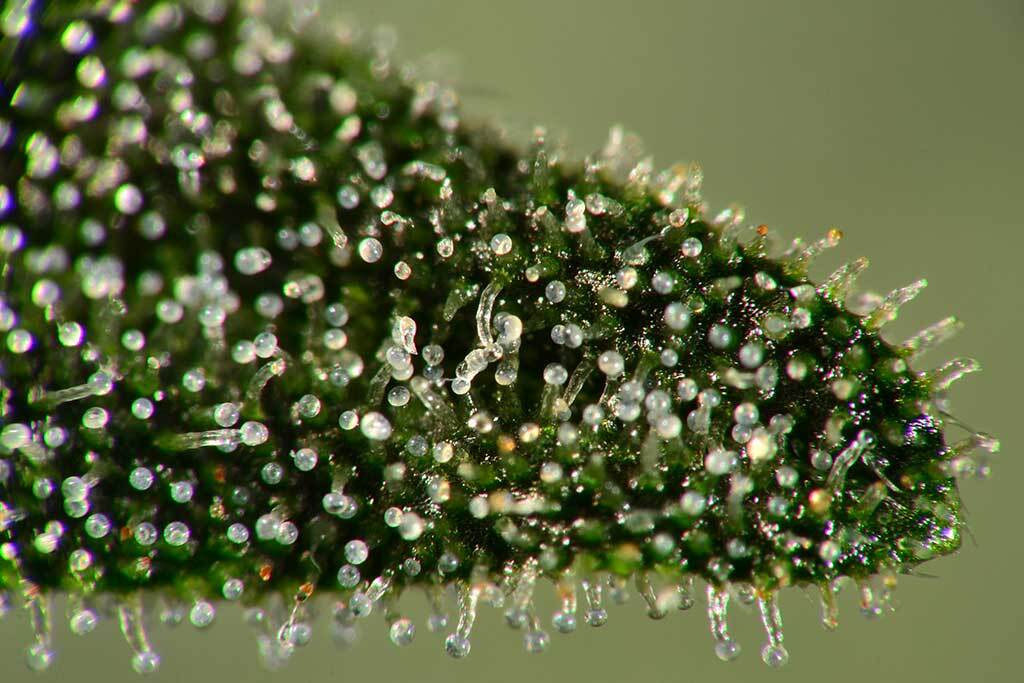
Once you have a good mix of cloudy and amber trichomes it’s time to harvest your autoflower plants. This is normally anytime between week 10 and 11 depending on the genetics you’re growing. You can also use the breeders’ strain description to give you a good idea of when to pull plants. After harvesting you’ll dry, trim and cure autoflower buds just like you would photoperiod.


What Week Do Autoflowers Begin to Fatten Up?
Generally, autoflowers start to fatten up around weeks 5 to 7. However, it’s important to recognize that this can vary depending on the strain. As your plant transitions from the vegetative phase into the flowering stage, you’ll notice the buds become dense and plump. During this period, it’s crucial to provide the right nutrients, particularly phosphorus and potassium, to support this growth.
How Do I Know When My Autoflower Is Going to Flower?
Typically, autoflowers enter the flowering stage around weeks 3 to 5. You’ll notice a few tell-tale signs: the plant starts developing small flowers or buds, and there might be an increase in the white pistils sprouting from the nodes. Moreover, the plant’s growth pattern begins to change, as it focuses more on bud development. At this juncture, you should reduce your veg nutes and switch to a bloom nutrient formula to boast bud production.
How Long Do Autoflowers Take From Start to Finish?
The duration from seed to harvest for autoflowers ranges widely depending on the strain, but it’s usually between 8 to 12 weeks. Some autoflowers, especially those with sativa genetics, might take a bit longer, while others with indica genetics might finish earlier. Keep an eye on the trichomes and pistils for indications of maturity. Amber-colored trichomes and a majority of brown pistils are good indicators that your plant is ready for harvest.
Why Is My Autoflower So Small?
If your autoflower is smaller than expected, several factors could be at play. Firstly, genetics can be a big influencer – some strains are naturally smaller than others. Secondly, inadequate lighting can stunt growth, as cannabis plants rely heavily on light for growth. Additionally, poor nutrition, over-watering, or root issues can contribute to stunted growth. It’s also essential to consider that autoflowers generally tend to be more compact compared to photoperiod cannabis plants.
What Triggers Flowering in Autoflowers?
The main difference between autoflower and photoperiod strains that require a change in light cycle to trigger flowering, autoflowers begin flowering based on age, thanks to their ruderalis genetics. This means that regardless of the light cycle, autoflowers will automatically transition into flowering after a certain period of growth. However, it’s still important to provide them with an appropriate light schedule, such as 18/6 or 20/4, to maximize growth during the vegetative stage and support budding during flowering.
Autoflower Genetics for Fast Harvests
In conclusion, understanding the growth cycle and needs of autoflowering cannabis plants is critical for a successful grow. By monitoring your plants carefully week by week and comparing it to these pictures you should have a good idea of how well your grow is going.
2 Replies to “Autoflower Life Cycle Week By Week In Pictures”
Leave a Reply
You must be logged in to post a comment.
My autos are now 4 weeks in the ground 35cm in hight but now sighn of flower.. I dont know that is not normal..
My last grow was a nother strain and in week 5 had big buds alredy!!!
It’s my first time doing this and I wanted to know whether it’s time to harvest or not got a lot of orange Pistons and the leaves are turning yellow but some are turning purple around the edges don’t want to do it too early but don’t want to leave it too late was trying to upload but can’t work out of haw oh sorry forgot to say I live in Spain