The Best Soil For Autoflowers – Store bought and home made
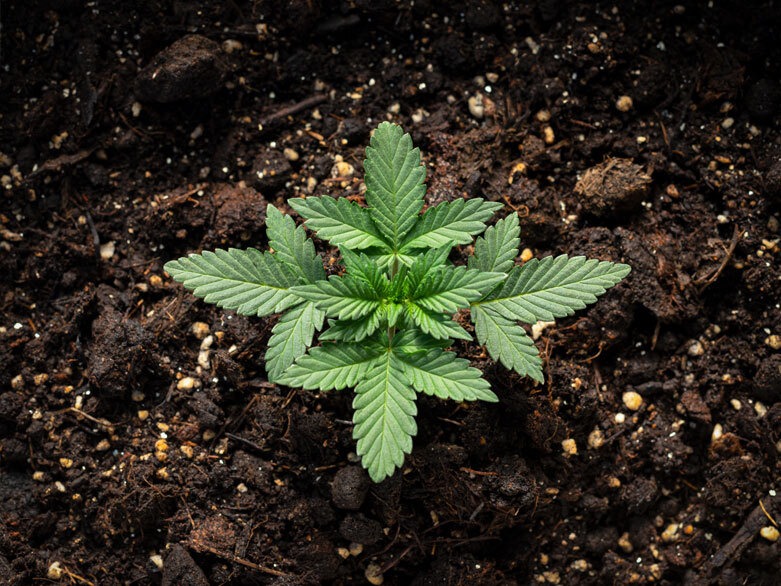
Autoflowering cannabis strains are loved for their hardiness, quick flowering times, and how easy they are to cultivate. And unlike feminized strains, they aren’t photo-dependent. This makes them popular among experienced growers and ideal strains for newbies. But if they’re to provide the yields you crave, it’s vital you know about the best soil for autoflowers.
Their short growing cycles mean there’s little room for error. Planting your seeds in the right substrate — and maintaining the right conditions throughout the growing process — is imperative if you want your plants to thrive.
What Type of Soil Should You Use?
When it comes to autoflowers, aeration is the name of the game. Be sure to use light and airy soil. This increases root oxygenation and allows roots to grow deeper. The more oxygen a plant receives, the faster its metabolic process will be, and the more quickly it will grow. As the vegetation phase of an autoflowering strain tends to last just one month, it’s important to make the most of it. Maximize aeration to maximize your yields.
It’s also worth noting that autos require fewer nutrients than their feminized counterparts. Cannabis soil that is too nutrient-heavy will stunt their development. As will dense soil that holds excess moisture. We’ll touch on this more below.
What makes a good soil for cannabis
- Nutrient Content: Look for soils where the nutrient levels are clearly listed on the packaging, including N-P-K (nitrogen, phosphorus, potassium) values, and the amounts of perlite, vermiculite, and compost. Trace elements and microbial life such as bacteria and fungi should also be noted.
- Presence of Worms: Healthy soil often contains worms. These creatures not only aerate the soil as they move but also release beneficial bacteria that enrich the soil.
- Proper Aeration and Moisture Retention: Ideal soils for cannabis include additives like perlite or coco coir, which help maintain the perfect balance of air and water retention, essential for robust root growth.
What makes a bad soil for cannabis
- Unpleasant Odor: A bad smell from the soil is a warning sign of harmful bacterial activity, often indicating an acidic and unfavorable environment for cannabis growth.
- Poor Drainage: If the soil does not drain well, it tends to become dense and heavy, which can severely restrict root growth and overall plant development. An imbalanced water retention and drainage system is detrimental to healthy plant growth.
- Lack of Essential Components: Soils lacking in components like perlite, which are crucial for adequate drainage and moisture retention, should be avoided unless specifically seeking a medium like pure worm castings for particular cultivation needs.


Maintaining the Correct pH for you soil
But first, the importance of keeping your soil at the correct pH. The pH scale goes from zero to 14: pH levels below seven are acidic; seven is neutral; and levels above seven are alkaline. When growing cannabis, your soil’s pH impacts the plant’s ability to absorb nutrients. As such, it has a huge bearing on growth, and symptoms of poor soil pH are often mistaken for nutrient problems.
The best soil for cannabis growing should have a pH in the range of 6-6.5. Be sure to test it regularly and adjust it if necessary. There’s a wide variety of testing equipment on the market, from digital probes to paper strips, and a number of ways you can treat it. Dolomite can increase the pH level of your soil, while pine needles are an effective natural method of lowering it. If you’re struggling to keep it under control, also check the pH of the water you’re giving to your plants.
How to apply extra nutrients to your soil
Overfeeding autos is a common beginner’s mistake. Thanks to their relatively small size and short growth times, they don’t require the same amount of nutrients as feminized strains. Apply supplements sparingly.
During the seedling phase, autos shouldn’t require any additional nutrients if the soil already contains them. You may begin adding nutrients after a couple of weeks, but only very lightly. The short vegetation phase means it isn’t necessary to increase nitrogen levels in the way it is with photoperiod strains. If you overdo it, you can burn the plant, reducing the size and quality of your yield.
It can take up to two weeks to recover from nutrient burn. This is a significant portion of the growth cycle of an autoflowering strain — and valuable time lost. When growing autoflowering cannabis, it’s better to take a “less is more” approach to nutrients. Embrace the low-maintenance cultivation process that makes autos so popular.
Do autoflowers need a lot of nutrients?
No, autoflowers do not need a lot of nutrients. Because of their much shorter growth cycle and smaller size they will only need around a third to half the level of nutrients compared to photoperiod plants.
Autoflowers thrive on a smaller feeding schedule that matches their quick development from seedling to harvest. It’s important to provide them with a well-balanced nutrient mix that includes all of the essential elements in the right proportions but to avoid over-fertilization. Overfeeding can lead to nutrient burn, which can stress the plant and hinder its growth.
How to make your own super soil for autoflowers
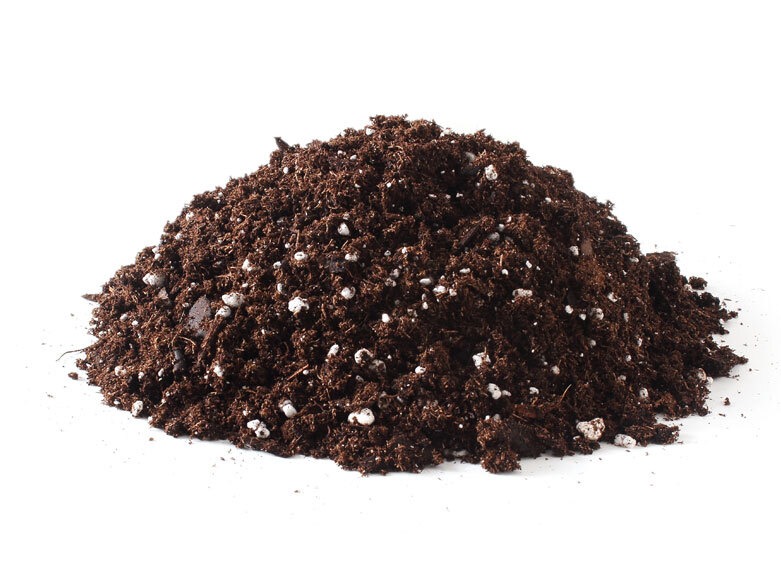
Given the unique requirements of autoflowering strains, many growers recommend making your own soil mix. Thankfully, this is quite easy. The ideal mix for growing autos can be made by combining peat moss, compost, perlite or coco coir, and vermiculite in the following ratio:
- 3 parts peat moss
- 3 parts compost
- 2 parts perlite or coco coir
- 1 part vermiculite
This simple recipe provides the right balance of nutrients for your plant. And materials like perlite, coco coir, and vermiculite enhance the aeration of the substrate, giving you an effective cannabis soil that you can make at home.
What is the best soil for marijuana
The ideal soil mix for autoflowers, or marijuana in general should be tailored for your specific grow. However, a good all rounder soil could start with a solid base of 70-80% organic soil, enhanced with additives such as perlite, coco fiber, biochar, or vermiculite, each chosen based on their unique properties and your climate needs. For example, in dry climates, coco fiber or biochar can enhance water retention, while perlite is great in humid conditions to improve soil aeration and dryness. Combining these elements thoughtfully, such as using 15% perlite and 15% coco fiber, ensures the soil is aerated yet retains sufficient moisture without leading to overwatering. It’s crucial to observe your plants and adjust the soil composition as needed, maintaining a balance that avoids excess water or oxygen. This approach will support optimal growth and health of your autoflower plants.
What is the best store bought soil for autoflowers?
For autoflowers, you’ll want a store-bought soil that is around 70-80% organic soil and complemented something like 15% perlite and 15% coco fiber. This combination will provide excellent aeration and moisture retention without the risk of overwatering.
FoxFarm’s Ocean Forest Potting Soil is a blend of natural ingredients, including earthworm castings, bat guano, and sea-going fish and crab meal, along with aged forest products, sandy loam, and sphagnum peat moss which together create a well-aerated, nutrient-rich base. Although it already contains perlite and some moss, you might consider adding a bit more perlite and coco coir to customize the mix to reach the exact 15% ratio each for optimal results for autoflowers.
This soil is really popular among growers for its balanced pH and comprehensive nutrient profile, making it a solid choice for autoflowering cannabis plants right out of the bag.
Other Mediums for Growing Autoflowering Cannabis
But soil isn’t the only suitable medium for growing autoflowering cannabis. Autoflowering seeds can also be cultivated in materials such as coco coir and worm castings, and using hydroponic systems.
Growing autoflowers using coco coir
Coco Coir is fibrous peat made from coconut husks. When added to a soil mix, it makes the soil more lightweight, increases air pockets, and wicks away unwanted moisture. It can also be used as a growing medium by itself. In this case, it has the added advantage of coming with a pre-adjusted pH. All of these factors make coco coir synonymous with high yields and an easy medium to use.
One drawback is that it doesn’t contain any nutrients, so you’ll need to apply them from the first week of growth. But this also enables you to customize them precisely to match your needs.
How often to autoflowers need watering in coco coir?
The frequency of watering autoflowers in coco coir depends on several factors including evaporation rates and the moisture content of the coco coir itself. Typically, watering once daily is adequate during the initial few weeks under normal growing conditions. As the plants mature and their water demands increase, you should adjust to watering up to twice a day.
A good rule of thumb is to water your plants about two hours after the lights turn on and again two hours before the lights go off. This schedule ensures that the plants have enough moisture during their active growth periods and helps prevent issues related to over or under-watering.
Growing autoflowers using hydroponics
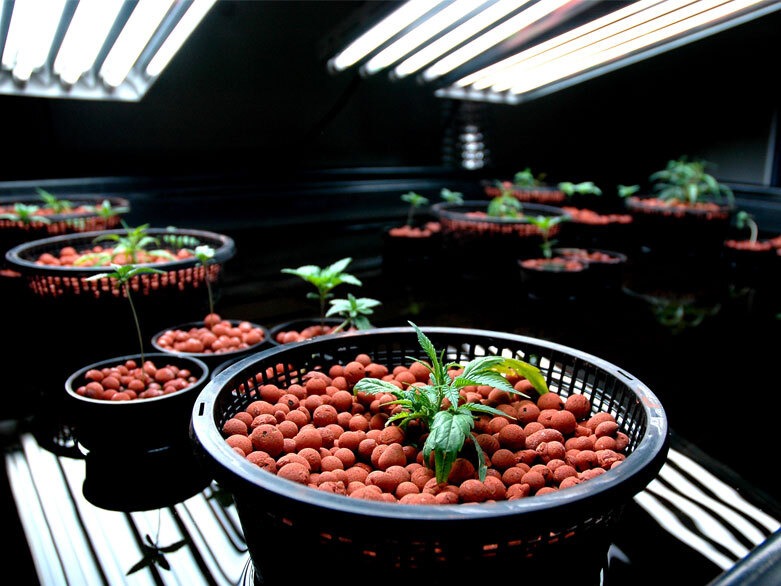
A hydroponic setup grows plants by soaking their roots in water usually using a medium such as clay pebbles. Or, more specifically, in water that’s full of nutrients and oxygen. Applying these essential inputs directly to the roots causes plants to grow bigger and faster.
The initial setup requires some equipment: you’ll need a water pump, an air stone (for certain systems) a timer, and at least two reservoirs. You’ll also need to measure the pH and PPM levels every day. But you’ll be rewarded in the long-run. Once established, hydroponic systems are low maintenance and highly productive.
Growing autoflowers using Worm Castings
Worm castings are a fertilizer manufactured from worm excrement. They’re not a growing medium in their own right, but they can be a useful addition to a soil-based substrate. We’d recommend a mix of 50% basic soil (free from additional nutrients), 25% perlite or coco coir, and 25% worm castings. Place the worm castings at the bottom of the pot so that roots can only reach them one they have grown sufficiently. This will provide your plants with a moderate nutrient boost without overfertilizing them.
Using kelp and bone meal to add organic nutrients to your soil
Using kelp and bone meal can significantly enrich autoflower soil with essential nutrients. Bone meal, a rich source of phosphorus and calcium, suits outdoor autoflower growing but requires pH adjustment due to its acidity. Kelp meal adds over 65 essential elements and minerals, including potassium, enhancing both the flavor and color of cannabis.
Is compost good for autoflowers?
Yes, compost is excellent for autoflowers because It offers a rich source of both macronutrients and micronutrients which help the plant to grow. Adding mature compost to your soil enhances its fertility and nutrient availability, supporting healthy development throughout the life cycle of your autoflowers.
Incorporating compost into your autoflower soil mix not only boosts nutrient levels but also improves soil structure, which is crucial for root health and water retention. This makes it an excellent choice for creating a nurturing environment for your plants.
Using vermiculite to improve soil
Using vermiculite can significantly enhance the quality of your soil. Like perlite, vermiculite offers several benefits that promote healthier and faster growth in autoflowering cannabis plants. This naturally occurring mineral is excellent for aerating the soil, and it has a strong capacity to retain water and nutrients, all without being toxic or altering the soil’s pH.
If you find that your soil is too dense or struggles with proper drainage, integrating vermiculite can improve the growing medium, giving autoflower roots the ideal environment to thrive. However, it’s important to use vermiculite in the correct proportions. However, overuse can lead to excessive water and nutrient retention, which might adversely affect your plants by causing nutrient or water overload.
Using perlite to improve soil
Using perlite in your soil mix can greatly improve its structure and functionality. Perlite is primarily used to enhance aeration and texture within the soil. By incorporating the right amount of perlite, you not only boost the soil’s drainage capabilities but also prevent it from compacting. This creates a more hospitable environment for roots to expand and grow efficiently.
Perlite is often mixed with coco fiber and soil to create an optimal growing medium. While perlite increases the soil’s airiness, coco fiber helps in retaining moisture. Balancing these two components effectively ensures that your plants’ roots receive the right mix of air and water, crucial for healthy growth.
A Few Final Pointers
Now before you get started, here are a few final tips to help you on your way:
Don’t Let Your Soil Get Too Moist
Roots only absorb enough oxygen when they’re not wet, and over-watered soil inhibits growth. Only water your plants every second day or when the soil has completely dried out during the vegetation phase. This way, their roots will expand in search of water.
Don’t Re-Pot
Don’t stress your autos out if you want to maximize their yields. Plant them straight in their final location to avoid the stress of re-potting.
Use Pots That Maximize Aeration
Aeration is key to a healthy, high-yielding plant. And after your growing medium, the most important factor here is your pot. We recommend using a smart pot or an air pot in order to get the best results.
To Sum Up
Ultimately, there are just a few fundamentals when it comes to planting autoflowering cannabis. Remember that aeration is king. The best soil for autoflowers will be light and allow plenty of oxygen to the roots. Don’t overdo the nutrients! Autos take less feeding and will suffer if you do too much. Know that it’s possible to make your own effective soil mix. And get the right pot. A container that maximizes airflow and provides good drainage is essential. And finally: soil improves over time. The more growth cycles you attempt, the better it will get.
5 Replies to “The Best Soil For Autoflowers – Store bought and home made”
Leave a Reply
You must be logged in to post a comment.
I was wanting to know what brands of soil to use.. i dont wanna make mine.. and where can i find step by step instrutions on how to grow autoflowers
I have a few bags of burpee, natural and organic raised garden and container mix .11-.11-.11. Will this be ok for autos?
I’m looking to buy soil for autoflowers indoor grow I work a lot of overtime so I need soil that I don’t need to add anything to feed it.I bought a ppm ec meter and ph meter the ph meter I have to keep calibrating it I’m out of the solutions for calibrating so I need to find a ph meter that works and I don’t have to calibrate it every day.
Hi All….need a bit more information on the DIY soil mix. What is a “part” is it a weight or a volume? Ingredients for the mix appear to be volume but want to check.
Thanks for the info!
Soil improves over time. Do you mean use the same soil over and over or I will get better at building my own soil with every new batch